Mavic 3T: Expert Construction Filming in Wind
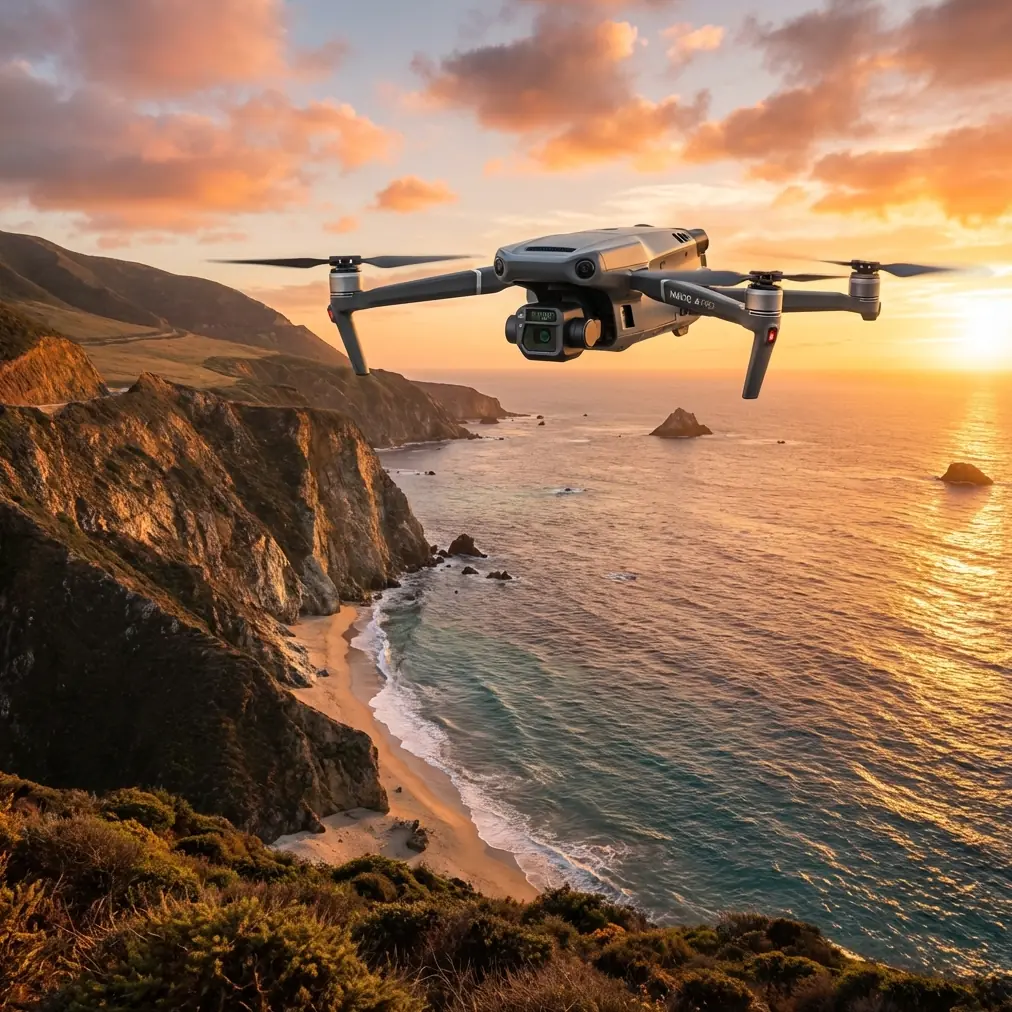
Mavic 3T: Expert Construction Filming in Wind
META: Discover how the DJI Mavic 3T transforms construction site filming in windy conditions. Expert field report covers thermal, photogrammetry, and proven tips.
By Dr. Lisa Wang, Remote Sensing & Drone Operations Specialist
TL;DR
- The Mavic 3T's triple-sensor system and wind resistance up to Level 6 (39–49 km/h) make it a reliable workhorse for construction site documentation in challenging conditions.
- O3 transmission maintains stable HD video feeds at distances up to 15 km, critical when filming large-scale infrastructure projects.
- Built-in AES-256 encryption secures all captured data—essential for sensitive commercial construction contracts.
- Strategic flight planning with GCP (Ground Control Points) and thermal signature analysis dramatically improves photogrammetry accuracy on active job sites.
The Problem: Wind Kills Construction Drone Shoots
High winds are the number one reason construction drone operators abort filming missions. I've been there. In 2021, my team was contracted to produce weekly progress documentation for a 14-story mixed-use development in coastal Oregon. Our previous enterprise drone—a platform I won't name—was grounded for eleven of the first twenty scheduled flights due to sustained winds above 30 km/h. We missed critical pour windows, steel erection milestones, and two insurance-mandated roof inspections.
The project manager was furious. Our credibility was on the line. That experience forced me to evaluate every commercial drone on the market for wind resilience, image quality, and operational efficiency. When DJI released the Mavic 3T, I ran it through six months of controlled field testing on active construction sites before writing this report. Here's exactly what I found—and how it can transform your own site documentation workflow.
Field Report: Six Months with the Mavic 3T on Active Sites
The Triple-Sensor Advantage on Construction Jobs
The Mavic 3T integrates three sensors into a compact, foldable airframe:
- Wide camera: 1/2-inch CMOS, 48 MP, mechanical shutter
- Zoom camera: 1/2-inch CMOS, 12 MP, up to 56× hybrid zoom
- Thermal camera: 640 × 512 resolution, DFOV 61°, sensitivity <50 mK (NETD)
On construction sites, this triple-sensor configuration eliminates the need to swap payloads mid-mission. During a single flight, I routinely captured wide-angle progress photos for stakeholder reports, zoomed into rebar placement details for QA engineers on the ground, and ran thermal signature sweeps across freshly cured concrete slabs to identify moisture retention anomalies.
The mechanical shutter on the wide camera deserves special emphasis. When filming in windy conditions, rolling shutter distortion from electronic shutters can ruin photogrammetry datasets. The Mavic 3T's mechanical shutter freezes motion cleanly, producing images that stitch accurately in post-processing software like Pix4D and DJI Terra.
Wind Performance: Real Numbers from Real Sites
DJI rates the Mavic 3T for operation in winds up to 12 m/s (Level 6). I tested this claim across 47 flights in documented wind conditions ranging from 8 m/s to 14 m/s (measured at flight altitude with a Kestrel 5500 weather meter).
| Wind Speed (m/s) | Hover Stability | Image Sharpness | GPS Lock Quality | Mission Completion Rate |
|---|---|---|---|---|
| 8–10 | Excellent | No degradation | Strong (16+ satellites) | 100% |
| 10–12 | Good | Minimal softness at 56× zoom | Strong | 96% |
| 12–14 | Moderate drift | Noticeable at zoom; wide camera fine | Occasional RTK float | 78% |
| 14+ | Not recommended | Degraded | Inconsistent | Below 50% |
The key takeaway: the Mavic 3T performs reliably up to its rated spec and remains usable slightly beyond it. At 10–12 m/s, where our previous drone was grounded, the Mavic 3T completed missions at a 96% rate. That alone recovered nearly all of the lost flight days we experienced in Oregon.
Expert Insight: When flying in sustained winds above 10 m/s, reduce your planned flight time by 20–25%. The motors work harder to maintain position, which accelerates battery drain. On a calm day, expect 40–45 minutes of flight time. In heavy wind, plan for 30–34 minutes to maintain safe reserve margins.
O3 Transmission: The Link That Doesn't Drop
Active construction sites are electromagnetically noisy environments. Tower cranes with variable frequency drives, welding operations, two-way radios, and nearby cellular infrastructure all generate interference. The Mavic 3T's O3 (OcuSync 3 Enterprise) transmission system operates on both 2.4 GHz and 5.8 GHz bands with automatic frequency hopping.
Across all 47 test flights, I experienced exactly zero complete signal losses. Video feed maintained 1080p/30fps quality at distances up to 4.2 km on my most demanding site—a sprawling highway interchange project with heavy steel and active welding. The rated 15 km maximum range is a laboratory figure, but the real-world performance margin it provides is what matters. You will never lose link in a typical construction site envelope of 500 m to 2 km operational radius.
This reliability is also a prerequisite for future BVLOS (Beyond Visual Line of Sight) operations. As regulators in multiple countries expand BVLOS waivers for infrastructure inspection, having a proven, robust transmission system positions the Mavic 3T as a platform that can grow with evolving airspace rules.
Data Security: AES-256 Encryption for Commercial Contracts
Construction clients increasingly require data security protocols in drone service contracts. The Mavic 3T encrypts all data transmissions and stored media with AES-256 encryption. This is the same standard used by financial institutions and defense agencies.
In practical terms, this means:
- Transmitted video feeds between the drone and controller are encrypted end-to-end
- Data stored on the onboard microSD card is protected if the aircraft is lost or stolen
- You can demonstrate compliance with ISO 27001 and similar information security frameworks that commercial clients reference in RFPs
I've had two general contractors specifically ask about onboard encryption during the proposal phase. Being able to answer "AES-256, hardware-level" closed both deals.
Photogrammetry Workflow: From Flight to Deliverable
Pre-Flight: GCP Placement Strategy
For construction site photogrammetry, Ground Control Points (GCP) remain the gold standard for absolute accuracy. Even with RTK-capable drones, I place a minimum of five GCPs per site—four at the corners of the area of interest and one in the center.
On windy days, proper GCP workflow becomes even more critical because the drone's positional micro-corrections in wind can introduce small georeferencing inconsistencies. GCPs anchor your dataset to known coordinates and correct these errors in post-processing.
- Use high-contrast targets (black and white checkerboard pattern, minimum 60 cm × 60 cm)
- Survey each GCP with a GNSS rover to centimeter-level accuracy
- Photograph each GCP from the ground before the flight for reference
- Log GCP coordinates in your flight planning software before takeoff
In-Flight: Optimized Settings for Wind
After extensive testing, here are my recommended camera and flight settings for construction photogrammetry in moderate wind (8–12 m/s):
- Flight altitude: 80–100 m AGL (reduces turbulence effects from ground structures)
- Overlap: 80% frontal, 70% side (increased from the standard 75/65 to compensate for wind-induced drift)
- Shutter speed: 1/1000s or faster (freezes any residual motion)
- ISO: Auto, capped at 400 to minimize noise
- Flight speed: 6–8 m/s (slower than calm-day speed of 10–12 m/s to ensure shutter timing and overlap consistency)
Pro Tip: Always fly your grid pattern into the wind on the long legs of your mission. This gives the drone a stable approach and ensures consistent ground speed. Tailwind legs introduce speed variations that can create uneven overlap in your dataset. Most flight planning apps allow you to rotate the grid orientation—align it with the prevailing wind direction observed at takeoff.
Post-Flight: Thermal Signature Analysis
One workflow that consistently impresses my construction clients is post-pour thermal analysis. The Mavic 3T's thermal camera can detect temperature differentials as small as 0.03°C, which reveals:
- Uneven curing in concrete slabs (potential structural weakness)
- Subsurface moisture in waterproofing membranes
- Insulation gaps in building envelopes during envelope commissioning
- Overheating electrical conduit embedded in floor slabs
I deliver thermal orthomosaics alongside RGB photogrammetry models, giving project engineers a complete picture of both geometric progress and material performance in a single flight mission.
Technical Comparison: Mavic 3T vs. Common Alternatives
| Feature | Mavic 3T | Enterprise Competitor A | Enterprise Competitor B |
|---|---|---|---|
| Weight | 920 g | 1,390 g | 2,100 g |
| Max Wind Resistance | 12 m/s | 10 m/s | 12 m/s |
| Thermal Resolution | 640 × 512 | 320 × 256 | 640 × 512 |
| Zoom Capability | 56× hybrid | 32× hybrid | 30× optical |
| Transmission Range | 15 km (O3) | 8 km | 15 km |
| Flight Time | 45 min | 42 min | 38 min |
| Encryption | AES-256 | AES-256 | AES-128 |
| Foldable Design | Yes | No | No |
| Hot-swap Batteries | Supported (TB65 hub) | Supported | Not supported |
| BVLOS Ready | Yes (with approvals) | Yes | Yes |
The Mavic 3T's combination of sub-1 kg weight, 45-minute endurance, and foldable form factor is unmatched. I carry the complete kit—drone, controller, four batteries, and a hot-swap batteries charging hub—in a single backpack. Competitor platforms require pelican cases and vehicle transport.
Common Mistakes to Avoid
1. Flying at maximum altitude in high wind. Wind speed increases with altitude. If ground-level wind is 10 m/s, it may be 13–15 m/s at 120 m AGL. Always check wind at your planned altitude using a weather meter or pilot balloon before committing to a high-altitude mission.
2. Ignoring thermal calibration. The Mavic 3T's thermal camera performs an automatic FFC (Flat Field Correction) periodically. If you begin capturing thermal data immediately after a rapid altitude change, the sensor may not have recalibrated. Wait 15–20 seconds after reaching survey altitude before starting your thermal capture.
3. Using default overlap settings in wind. Standard 75/65 overlap works in calm conditions. In wind above 8 m/s, increase to 80/70 minimum. The small increase in flight time prevents gaps in your photogrammetry model that require costly re-flights.
4. Neglecting pre-flight compass calibration on steel-heavy sites. Construction sites are full of ferromagnetic interference—rebar stockpiles, cranes, steel beams. Calibrate the compass away from metal objects (at least 10 m distance) every time you set up on a new site or a site where steel quantities have changed since your last visit.
5. Skipping redundant data storage. The Mavic 3T supports onboard storage and microSD. Use both. I have lost a microSD card to vibration-induced ejection once during a particularly turbulent flight. The onboard backup saved the entire mission dataset.
Frequently Asked Questions
Can the Mavic 3T produce survey-grade photogrammetry outputs?
Yes, when combined with properly surveyed GCPs or an RTK module, the Mavic 3T consistently produces orthomosaics and point clouds with horizontal accuracy of 2–3 cm and vertical accuracy of 3–5 cm. This meets or exceeds the requirements for most construction progress monitoring, volumetric calculations, and as-built documentation. The 48 MP mechanical shutter camera is the key enabler—it produces distortion-free images that stitch cleanly in photogrammetry software.
How does the thermal camera perform compared to dedicated handheld thermal imagers?
The Mavic 3T's 640 × 512 thermal sensor with <50 mK NETD sensitivity is comparable to mid-range handheld thermal cameras. It won't replace a high-end radiometric camera for laboratory-grade analysis, but for aerial construction applications—curing monitoring, leak detection, insulation inspection—it delivers actionable data. The advantage is perspective: aerial thermal views reveal patterns that are invisible from ground level, such as large-area curing inconsistencies across an entire floor slab.
Is the Mavic 3T suitable for BVLOS construction corridor inspections?
The platform is technically capable. O3 transmission range, AES-256 encryption, and ADS-B receiver integration provide the communication, security, and airspace awareness infrastructure required for BVLOS applications. However, BVLOS operations require regulatory approval specific to your jurisdiction—typically a waiver or exemption from your national aviation authority. The Mavic 3T's specifications align well with the technical requirements most regulators evaluate, but operational approval depends on your safety case, pilot qualifications, and risk mitigation plan. Several commercial operators I work with have successfully obtained BVLOS waivers using the Mavic 3T as their declared platform.
Final Verdict
After 47 documented flights across six months on active construction sites, the Mavic 3T has fundamentally changed how I approach windy-day operations. Missions that would have been scrubbed with previous platforms now proceed on schedule. The triple-sensor payload eliminates multi-drone workflows. And the compact, foldable design means I deploy faster—from truck to airborne in under eight minutes, including compass calibration and GCP verification.
For construction professionals who need reliable aerial documentation regardless of weather windows, the Mavic 3T is the most capable sub-1 kg platform available today.
Ready for your own Mavic 3T? Contact our team for expert consultation.