M3T Construction Site Inspection Tips for Remote Jobs
M3T Construction Site Inspection Tips for Remote Jobs
META: Learn how to inspect remote construction sites with the Mavic 3T drone. Expert tips on thermal imaging, antenna positioning, and BVLOS workflows.
By James Mitchell | Remote Inspection Specialist & Certified UAS Operator
TL;DR
- Antenna positioning is the single biggest factor in maintaining stable O3 transmission at remote construction sites—orient them correctly to avoid signal drops at critical moments.
- The Mavic 3T's thermal sensor and mechanical shutter camera let you capture thermal signatures and photogrammetry-grade imagery in a single flight.
- Pre-planned GCP (Ground Control Point) placement and hot-swap batteries can cut a full site inspection from a full day down to 2–3 hours.
- AES-256 encryption protects sensitive site data from intercept during transmission—critical for government and infrastructure contracts.
Why Remote Construction Sites Demand a Different Inspection Approach
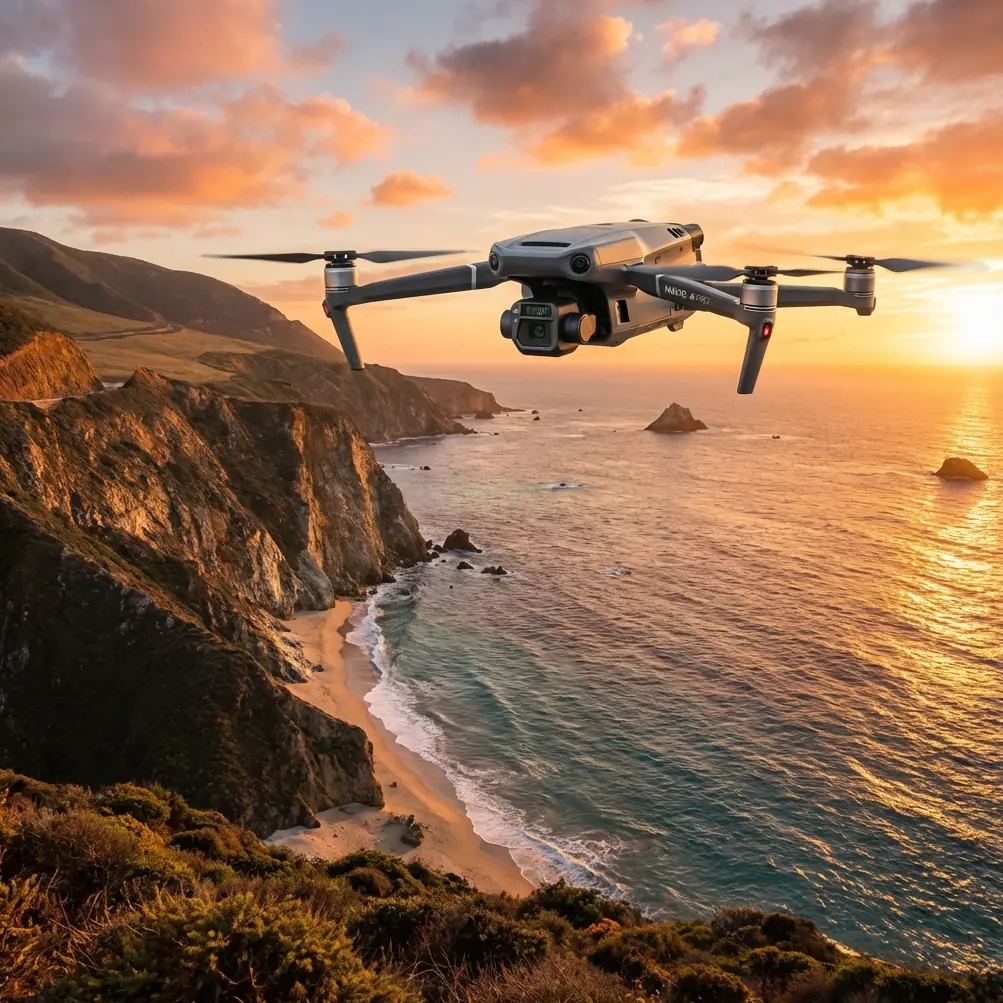
Remote construction sites punish poor preparation. You're dealing with limited cellular coverage, zero infrastructure for charging, unpredictable terrain, and often no line of sight to your aircraft. A standard consumer drone won't survive these conditions. The Mavic 3T was built for exactly this kind of operational environment.
This guide walks you through the complete workflow I use to inspect remote construction sites—from pre-flight antenna setup to post-flight deliverable generation. Every technique here comes from hundreds of hours flying the M3T across pipeline corridors, mining operations, and off-grid building projects.
Step 1: Pre-Mission Planning and GCP Deployment
Before the Mavic 3T leaves your case, you need ground truth. For any inspection that will feed into photogrammetry models, GCP placement is non-negotiable.
How to Place GCPs at Remote Sites
- Deploy a minimum of 5 GCPs spread across the site, with at least 1 GCP per 200 meters of linear distance.
- Use high-contrast checkerboard targets (minimum 60 cm × 60 cm) so the M3T's 20 MP wide camera can resolve them clearly from altitude.
- Log RTK or PPK coordinates for each GCP using a survey-grade GNSS receiver—sub-centimeter accuracy is the goal.
- If terrain is heavily sloped, add 2 additional GCPs at elevation extremes to prevent vertical distortion in your 3D reconstruction.
Flight Plan Configuration
Use DJI Pilot 2 to build your mission grid. For construction site inspections, I recommend:
- Flight altitude: 80–100 meters AGL for area mapping; 15–30 meters AGL for structural detail passes.
- Overlap: 75% frontal, 65% side for photogrammetry; increase to 80/70 in areas with complex geometry like scaffolding or earthwork cuts.
- Speed: Cap at 8 m/s during mapping runs to prevent motion blur on the mechanical shutter camera.
- Gimbal angle: -90° (nadir) for orthomosaic mapping; -45° for oblique passes on structures.
Pro Tip: Always fly your thermal pass and your RGB pass as separate missions. The thermal sensor operates at 640 × 512 resolution—a much lower pixel density than the wide camera. Trying to optimize altitude for both simultaneously means you compromise on both. Run the thermal pass lower (40–60 m AGL) to maximize thermal signature detection on buried utilities, curing concrete, and moisture intrusion points.
Step 2: Antenna Positioning for Maximum O3 Transmission Range
This is where most operators lose signal on remote jobs—and it's entirely preventable.
The Mavic 3T uses DJI's O3 Enterprise transmission system, which delivers a max transmission range of 15 km under ideal conditions. But "ideal conditions" don't exist at remote construction sites. Trees, terrain ridges, heavy equipment, and even dust clouds degrade signal.
The Antenna Rule You Must Follow
The DJI RC Pro Enterprise controller has two antennas. Their orientation relative to the aircraft determines your link quality:
- Point the flat face of both antennas toward the aircraft at all times. The antennas radiate signal perpendicular to their flat surface, not from the tips.
- Never point the antenna tips at the drone. This creates a signal null—the weakest point in the radiation pattern.
- As the drone moves across the site, physically rotate your body to keep the antenna faces aimed at it. This sounds basic. I've watched experienced operators lose video feed at 800 meters because they let the drone fly behind the antenna null.
Positioning Your Ground Station
- Set up on the highest accessible point on the site perimeter. Even 3–5 meters of elevation gain can dramatically improve signal penetration through terrain features.
- Keep a minimum of 10 meters between your controller and any metal structures, generators, or heavy equipment. RF reflection from steel structures causes multipath interference.
- If you're operating near BVLOS limits, consider using a secondary spotter with radio communication positioned at a midpoint to maintain visual awareness.
Expert Insight: On one pipeline corridor inspection in northern British Columbia, I gained 4.2 km of usable range simply by relocating my ground station from a valley floor to a gravel pad 12 meters higher. The O3 system held solid video feed at 9.8 km with zero dropouts. Elevation is free range—use it.
Step 3: Executing the Thermal Inspection Pass
The Mavic 3T's FLIR-based thermal camera with 640 × 512 resolution is your primary tool for finding problems invisible to the naked eye. On construction sites, thermal imaging reveals:
- Moisture intrusion in roofing assemblies and foundation waterproofing.
- Concrete curing anomalies—uneven thermal signatures indicate inconsistent curing that leads to cracking.
- Electrical hotspots in temporary site power distribution.
- Subsurface utility detection when ground temperature differentials are present (best captured in early morning or late evening).
- Insulation gaps in partially completed building envelopes.
Thermal Flight Best Practices
- Fly thermal passes during optimal delta-T windows: the first 2 hours after sunrise or the last 2 hours before sunset. This is when temperature differentials between materials and ambient air are greatest.
- Set thermal palette to Ironbow or White Hot depending on the deliverable. Ironbow is better for presentations to non-technical stakeholders; White Hot provides cleaner analytical data.
- Use spot metering mode when investigating specific anomalies; switch to area metering for broad surveys.
- Record radiometric JPEG files, not just visual thermal images. Radiometric data embeds actual temperature values at every pixel, enabling post-processing measurement in software like DJI Thermal Analysis Tool or FLIR Tools.
Step 4: Managing Power with Hot-Swap Batteries
Remote sites mean no power outlets. Your battery strategy directly determines how much work you accomplish.
The Mavic 3T offers approximately 45 minutes of flight time per battery under ideal conditions. In practice, with the payload of thermal and zoom operations, expect 33–38 minutes of usable flight time.
Battery Management Protocol
- Carry a minimum of 6 batteries for a full remote site inspection. This provides roughly 3–4 hours of total flight time after accounting for swap time and reserve margins.
- Use hot-swap technique: land the aircraft, power it down, swap the battery, and relaunch within 90 seconds. Keeping the controller powered on during swaps preserves your mission progress in DJI Pilot 2.
- Store batteries in a thermally insulated case in cold environments. Lithium polymer cells lose up to 20% capacity when cell temperature drops below 15°C.
- Always land with a minimum of 25% remaining charge at remote sites. You need that reserve for unexpected wind changes or go-around scenarios where there's no safe emergency landing zone nearby.
Technical Comparison: Mavic 3T vs. Common Alternatives
| Feature | Mavic 3T | Matrice 30T | Phantom 4 RTK |
|---|---|---|---|
| Thermal Sensor | 640 × 512 FLIR | 640 × 512 FLIR | None |
| Wide Camera | 20 MP, 4/3 CMOS, Mechanical Shutter | 12 MP, 1/2" CMOS | 20 MP, 1" CMOS, Mechanical Shutter |
| Zoom Camera | 12 MP, 56× Hybrid | 12 MP, 200× Hybrid | None |
| Max Flight Time | 45 min | 41 min | 30 min |
| Transmission System | O3 Enterprise (15 km) | O3 Enterprise (15 km) | OcuSync 2.0 (8 km) |
| Weight | 920 g | 3,770 g | 1,391 g |
| Encryption | AES-256 | AES-256 | AES-256 |
| Portability | Foldable, backpack-carry | Requires dedicated case | Medium case |
| RTK Support | Via D-RTK 2 or NTRIP | Built-in or D-RTK 2 | Built-in |
The Mavic 3T hits a unique sweet spot: enterprise-grade sensors in a sub-1 kg airframe. For remote construction sites where you're hiking in with gear, the weight advantage over the Matrice 30T is significant—2.85 kg lighter while retaining the same thermal resolution.
Step 5: Data Security with AES-256 Encryption
Construction inspection data often includes proprietary site layouts, progress documentation tied to contractual milestones, and infrastructure details that clients classify as confidential. The Mavic 3T applies AES-256 encryption to all data transmitted between the aircraft and controller.
What this means in practice:
- Video feed and telemetry data cannot be intercepted and decoded by third parties during flight.
- Enable Local Data Mode in DJI Pilot 2 to prevent any data from being transmitted to external servers during operation.
- For government and defense-adjacent construction projects, AES-256 meets the encryption standard required by most procurement specifications.
Common Mistakes to Avoid
Flying thermal at midday. Solar loading equalizes surface temperatures across materials, washing out the thermal signatures you need to detect problems. Always fly thermal during delta-T windows.
Ignoring antenna orientation. Losing video feed mid-mission isn't just inconvenient—it risks a flyaway over an active construction site. Keep antenna faces aimed at the aircraft at all times.
Skipping GCPs for "quick" inspections. Without ground truth, your photogrammetry model can drift by meters. Even a fast job needs a minimum of 5 GCPs if deliverables will be used for measurement.
Using a single battery strategy. Bringing only 2–3 batteries to a remote site forces you to rush flights and cut coverage. Carry at least 6 batteries and plan for hot-swap cycles.
Forgetting to record radiometric thermal data. Standard thermal JPEGs look nice but contain no measurable temperature data. Always enable radiometric capture so engineers can perform quantitative analysis post-flight.
Operating BVLOS without a spotter network. Regulatory compliance aside, flying beyond visual line of sight over active construction zones without spotters creates serious safety liability. Establish radio-linked visual observers at intervals.
Frequently Asked Questions
Can the Mavic 3T produce survey-grade photogrammetry without built-in RTK?
Yes, but with caveats. The M3T's 20 MP mechanical shutter camera eliminates rolling shutter distortion, which is the primary image quality requirement for photogrammetry. For positional accuracy, you compensate for the lack of onboard RTK by deploying GCPs with survey-grade GNSS coordinates. With 5+ well-distributed GCPs, you can achieve sub-3 cm horizontal accuracy in your final orthomosaic—meeting the tolerance required for most construction progress monitoring and earthwork volume calculations.
How does the O3 Enterprise transmission perform in mountainous or heavily wooded remote sites?
The O3 system operates on 2.4 GHz and 5.8 GHz dual bands with auto-switching. In heavily wooded or mountainous terrain, real-world range typically drops to 4–8 km depending on obstruction density. The single most effective countermeasure is elevating your ground station position. Even modest elevation gains of 5–15 meters can restore several kilometers of usable range. Avoid positioning near metal structures and keep the antenna faces perpendicular to the aircraft's direction.
Is the Mavic 3T suitable for BVLOS construction inspections?
The hardware absolutely supports BVLOS operations. The 15 km O3 transmission range, 45-minute flight time, and AES-256 encrypted link provide the technical foundation. However, BVLOS operations require regulatory approval (Part 107 waiver in the US, SFOC in Canada, or equivalent in other jurisdictions), a safety case, and typically a visual observer network. The M3T's compact size and extended endurance make it one of the most practical platforms for BVLOS inspection corridors, particularly along linear construction sites like pipelines, highways, and transmission line routes.
Start Inspecting Smarter at Remote Construction Sites
The Mavic 3T gives you thermal imaging, photogrammetry-capable RGB, and enterprise-grade security in a package you can carry in a backpack to the most inaccessible job sites. Master antenna positioning, nail your GCP placement, and fly thermal at the right time of day—and you'll deliver inspection reports that save your clients time and money on every project.
Ready for your own Mavic 3T? Contact our team for expert consultation.