Mavic 3T at High Altitude Construction Sites
Mavic 3T at High Altitude Construction Sites: A Field Case Study on Moisture, Failsafes, and Pre-Flight Discipline
META: Expert case study on using the Mavic 3T for high-altitude construction site inspection, with practical tips on thermal imaging, transmission stability, pre-flight cleaning, and fail-safe thinking.
By James Mitchell
High-altitude construction work exposes every weakness in an inspection workflow. Cold mornings compress battery confidence. Wind finds gaps in flight planning. Moisture behaves differently than many teams expect. And when the site is steep, unfinished, and crowded with steel, concrete, and temporary structures, a drone is not just a camera in the air. It becomes a decision tool.
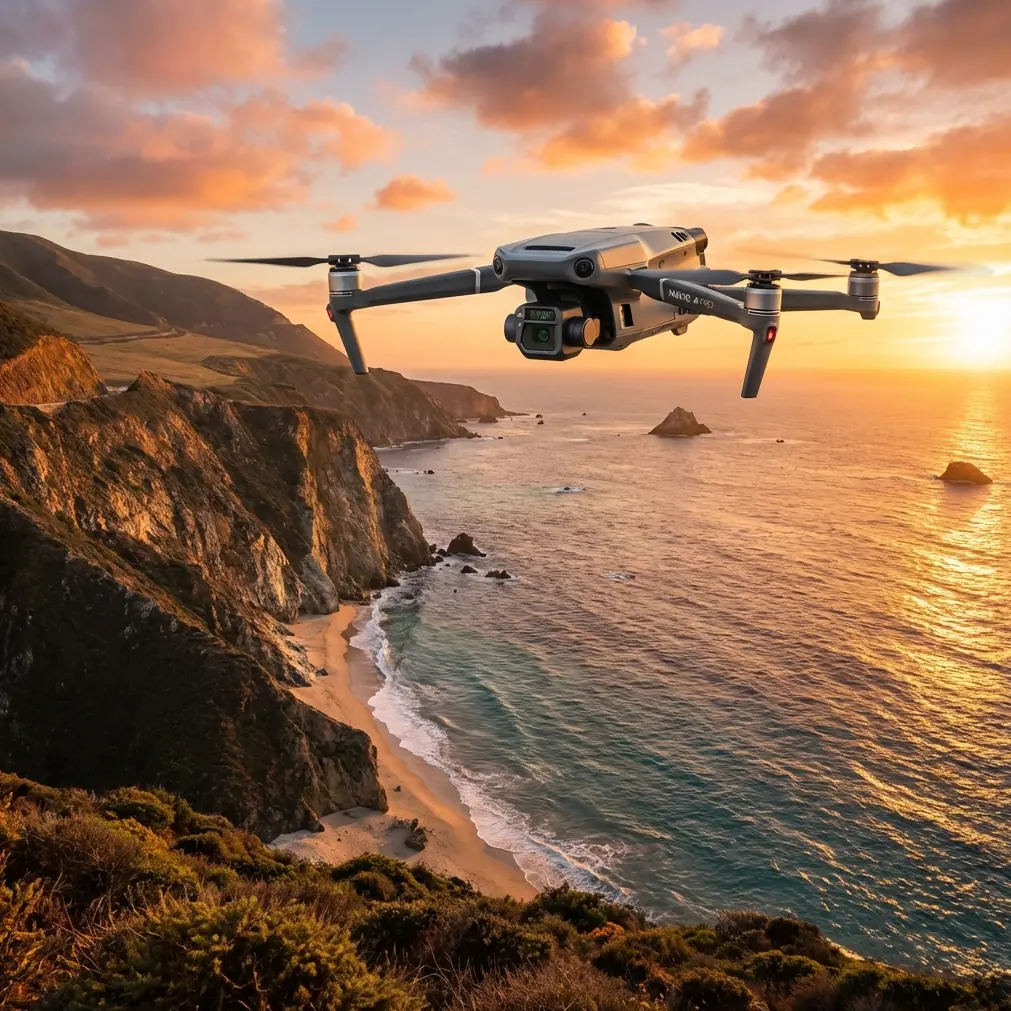
That is where the Mavic 3T earns attention. Not because it makes site inspection effortless, but because it compresses thermal imaging, visual documentation, and stable transmission into a compact aircraft that can be deployed quickly when conditions are narrow and time on site is expensive.
This case study looks at how I would approach a high-altitude construction inspection with the Mavic 3T, using one discipline that is often overlooked: borrowing safety logic from manned aviation. The reference material behind this article comes from older aircraft design work, including research on water droplet impingement and a fault-detection philosophy used in a nose-wheel steering system. On paper, that sounds far removed from a compact UAV. In practice, both ideas map directly to how a professional Mavic 3T operation should be conducted on a cold mountain jobsite.
The site problem: cold air, wet surfaces, incomplete structures
Picture the assignment. A contractor needs inspection coverage across a multi-level site at elevation. Retaining walls are partially complete. Roof membranes are being staged. Electrical and HVAC penetrations are open. Some sections have standing moisture from overnight condensation, while other surfaces are already warming unevenly in early sun.
This is exactly the kind of environment where the Mavic 3T’s thermal signature capability matters. Standard RGB imagery can document material placement, edge protection, façade alignment, and crane clearance paths. Thermal adds another layer: trapped moisture in roofing sections, temperature anomalies around temporary power runs, uneven curing zones, and heat leakage in enclosed service areas.
But high-altitude work changes how you prepare. Thin air and lower temperatures are only part of the story. Moisture deposition on the aircraft matters too.
Why a pre-flight cleaning step is not optional
One of the source references cites NACA TN3338 from March 1955, a dye-tracer method developed to study how water droplets strike arbitrary bodies and how droplet size distribution behaves on impact. Another cited thread of research, from 1949 and 1952, focused on droplet trajectories over airfoils and used extended Stokes-law thinking to understand motion and deposition.
That material came from a very different aviation era, yet the operational lesson is timeless: water does not land on a flying body randomly. Shape, flow, speed, and surface condition govern where droplets collect and how they spread.
For a Mavic 3T team working at elevation, this matters before takeoff, not after a problem appears. In mountain construction zones, aircraft often come out of a warm vehicle into cold ambient air. Condensation can form on the airframe, especially around sensor windows, exposed seams, and arm joints. Fine droplets or residue on the thermal lens can distort readings. Moisture near the vision system can also degrade obstacle sensing confidence. A thin film on the primary camera is enough to soften photogrammetry outputs and weaken tie-point consistency, even if the image looks “good enough” on the controller.
So my first practical rule is simple: add a deliberate cleaning and inspection pause after the aircraft acclimates.
Not a rushed wipe. A real pause.
I want the Mavic 3T out of the case long enough to equalize with ambient temperature. Then I inspect and clean:
- thermal lens window
- wide camera glass
- visible contamination around obstacle sensors
- battery contacts and seating surfaces
- arm hinges and landing surfaces
- propeller leading edges
This pre-flight cleaning step sounds mundane. It is one of the cheapest risk controls in the entire mission. The old droplet impingement studies explain why. If moisture behavior on aerodynamic bodies was worth formal testing in 1946, 1949, 1952, and 1955, then a modern drone operator should not treat dew, mist, or condensation as background noise.
On a high-altitude site, a dirty lens does not just affect image quality. It changes decisions. A false thermal anomaly can send a superintendent chasing a non-issue. A softened RGB dataset can compromise measurement confidence when your photogrammetry model is supposed to support progress verification against design.
The second lesson from aviation: watch the failures that matter most
The other reference is a description of the F-16A nose-wheel steering fault-detection logic. Again, very different aircraft, but the underlying principle is sharp. The system did not try to monitor everything equally. It focused on faults most likely to create a hard-over event, especially command and feedback potentiometer issues. When the fault logic detected a serious problem, it cut power, triggered the warning path, and allowed the wheel to move freely rather than forcing a dangerous commanded state.
That is elegant safety thinking: identify the failure modes that create the worst outcomes, and design the response to fail safe.
For Mavic 3T inspection work, operators should adopt the same mindset. Do not waste all your attention on minor nuisances while ignoring the few faults that can ruin the mission or create unsafe drift around structures.
At a high-altitude construction site, my “hard-over equivalents” are:
- Sensor contamination that compromises navigation or imaging.
- Link instability near steel, concrete, and elevation changes.
- Battery performance uncertainty in cold ambient conditions.
- Controller or mission-setting mismatch before takeoff.
- Compromised return path because the launch zone was chosen for convenience, not signal geometry.
The Mavic 3T’s O3 transmission system is strong, but a strong link is not magic. On terraced terrain or behind structural rises, line of sight can degrade quickly. A site team that assumes transmission strength will brute-force through every obstruction usually learns that lesson at the wrong time. At elevation, when the aircraft drops behind a retaining wall cut or behind an unfinished stair core, signal quality may dip exactly when the pilot is also managing wind and thermal survey framing.
That is why fail-safe thinking should shape the mission plan. If your route includes blind sectors, set them up intentionally. Build the flight from stable signal positions. Confirm RTH height against cranes, temporary towers, rebar cages, and cable paths. Treat transmission and path geometry as a design problem.
The F-16A reference also mentions simplification as a design aim. That matters here too. A lot of construction drone incidents start with procedural clutter. Too many ad hoc settings. Too many “we’ll fix it in the air” assumptions. The cleaner approach is better: standardize the pre-flight logic so the team can quickly detect abnormalities before launch.
The actual Mavic 3T workflow I recommend on mountain jobs
For this kind of site, I run the mission in three layers.
Layer 1: visual reconnaissance
The first flight is not the mapping flight. It is a reconnaissance pass. I use the RGB payload to identify wind behavior around edges, note reflective surfaces, verify active work zones, and check whether morning sun is already changing thermal contrast. If crews are moving materials with lifts or telehandlers, I want that observed from above before I start a tighter inspection pattern.
This pass also helps confirm whether a BVLOS-style route concept is even appropriate from a risk perspective, even if the operation remains within the specific regulatory framework required on site. Terrain can make a route look straightforward on a map and awkward in reality.
Layer 2: thermal inspection
Then I switch to the thermal-specific tasking. On high-altitude projects, thermal is strongest when the operator understands timing. Early morning often reveals moisture retention and insulation defects more clearly than midday. The Mavic 3T can detect differential heating across roof sections, equipment pads, cable runs, and partially enclosed utility spaces. On a construction site, that can support punch-list work, waterproofing checks, and staging validation before expensive rework compounds.
The catch is interpretation. Thermal signature is not self-explanatory. A colder patch may be moisture, shadow influence, material thickness difference, or recent environmental exposure. That is why thermal findings should be paired with the visual dataset and site context, not treated as isolated truth.
Layer 3: photogrammetry and verification
If the site also needs volumetrics, progress tracking, or as-built comparison, I then run a more disciplined image capture mission for photogrammetry. This is where lens cleanliness and environmental consistency become especially valuable. At altitude, light changes fast. So does shadow length. If the model must stand up for stakeholder review, I prefer to capture with known GCP placement where feasible and log any sections where shadows or active works might affect reconstruction quality.
The Mavic 3T is not marketed first as a pure mapping platform, but in practical construction workflows it often has to wear several hats in one day. That is exactly why disciplined sequencing matters. Recon first. Thermal next while the thermal story is still readable. Mapping or structured visual capture after that.
Cold batteries, short decisions
Battery management on these sites needs adult supervision. Cold air can punish casual habits. I want batteries warm before launch, and I want rotations planned so there is no ambiguity about which pack is next. If a crew is using a hot-swap rhythm between sorties to keep inspection momentum, labeling and health tracking become essential. Confusion at the battery table wastes more time than most teams admit.
The Mavic 3T platform supports efficient turnarounds, but efficiency without discipline just means making mistakes faster. I log pack sequence, ambient temperature, flight objective, and any abnormalities observed in discharge behavior. On elevated jobsites, these notes become useful very quickly when one section of the site consistently demands more power due to climbing profile, headwind exposure, or hover-heavy thermal inspection.
Security and transmission on sensitive projects
Some construction clients care deeply about data handling, particularly on infrastructure or utility-adjacent work. That is where secure link architecture becomes part of the conversation. The Mavic 3T’s AES-256 support and O3 transmission matter not because they sound impressive on a spec sheet, but because they support professional confidence in two practical areas: stable control and protected data movement within the intended operating framework.
On remote projects, the ability to maintain a robust feed while documenting thermal issues or structural progress can be the difference between a useful inspection and a half-finished dataset that needs another mobilization.
If your team is building a site-specific workflow for mountain construction or needs help selecting the right field setup, you can message a UAV specialist here.
What operators often miss
The most common mistake I see is not poor flying. It is poor interpretation of what the aircraft is telling them before the mission begins.
A smudge on the thermal lens is not cosmetic. A weak signal pocket behind a concrete core is not a surprise. A battery cooling too long on the tailgate is not bad luck. A poorly chosen launch point is not just inconvenient.
Each of these is an avoidable setup error.
That is why the two aviation references behind this article matter more than they first appear to. The water-droplet studies remind us that contamination patterns are physical and predictable enough to deserve attention. The F-16A fault-monitoring example reminds us that robust operations come from focusing on the few failures most likely to create loss of control or false system behavior.
Applied to the Mavic 3T, that means building an inspection routine around sensor integrity, signal geometry, battery certainty, and mission simplification.
Final field takeaway
If I had to reduce high-altitude construction inspection with the Mavic 3T to one sentence, it would be this: your best flights start on the ground, with a clean aircraft and a ruthless eye for failure modes.
That includes a literal cleaning step before takeoff.
Not because it looks professional. Because it changes outcomes.
A Mavic 3T can do serious work on mountain construction projects: thermal identification of hidden moisture patterns, visual inspection of structural progress, targeted documentation for engineering review, and photogrammetry support for planning and verification. But those benefits only show up consistently when the operator respects the environment and builds procedure around it.
The old aviation engineers who studied droplet impingement and fail-safe control logic were solving different problems. Their thinking still holds. Watch how moisture behaves. Monitor the faults that can produce the worst result. Simplify the response.
That is a good way to run a site inspection, whether the aircraft has a pilot onboard or not.
Ready for your own Mavic 3T? Contact our team for expert consultation.