Mavic 3T for Urban Venue Mapping: Expert Guide
Mavic 3T for Urban Venue Mapping: Expert Guide
META: Learn how the DJI Mavic 3T transforms urban venue mapping with thermal imaging, photogrammetry workflows, and centimeter-level accuracy. Expert tutorial inside.
By James Mitchell | Drone Mapping & Survey Specialist | 12+ Years in Commercial UAS Operations
TL;DR
- The Mavic 3T combines a mechanical shutter, thermal sensor, and zoom camera in a single compact airframe—purpose-built for urban photogrammetry and venue mapping.
- O3 transmission maintains rock-solid video at up to 15 km, critical when mapping complex urban structures with signal interference.
- GCP-integrated workflows deliver centimeter-level accuracy without the bulk of enterprise-class fixed-wing platforms.
- Hot-swap batteries and a 45-minute flight time let you map an entire stadium or arena complex in a single session.
Why Urban Venue Mapping Demands a Purpose-Built Tool
Mapping stadiums, convention centers, amphitheaters, and event complexes in dense urban environments punishes generic drones. You're battling signal reflections off steel structures, thermal interference from HVAC systems, tight no-fly margins near buildings, and the relentless demand for survey-grade deliverables that architects and city planners actually trust.
The DJI Mavic 3T was engineered to solve exactly these problems. This tutorial walks you through the complete workflow—from mission planning to final orthomosaic export—so you can deliver professional venue maps that meet or exceed traditional survey accuracy.
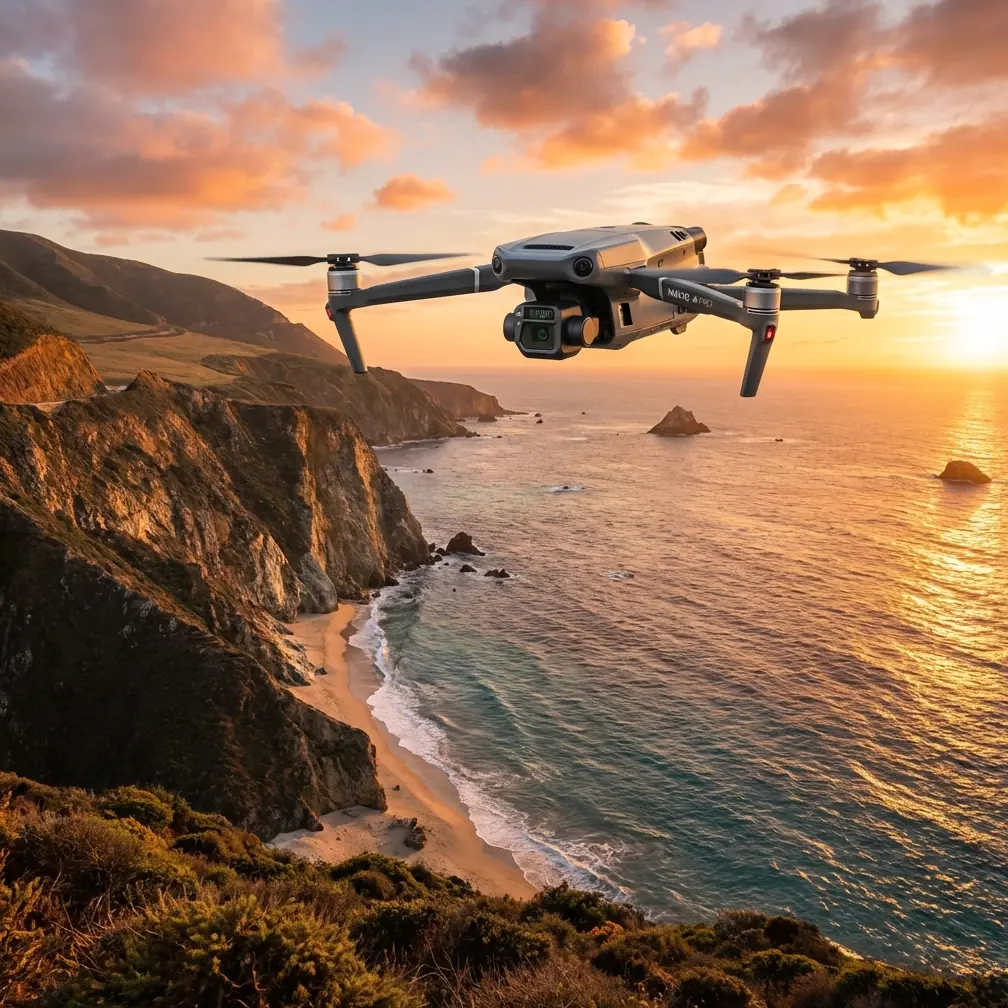
Most operators default to the Autel EVO II Pro or the Skydio X10 for urban mapping. Both are capable machines. But neither integrates a thermal sensor, 56× zoom camera, and wide-angle mechanical shutter camera into a single 920g airframe that fits in a backpack. That triple-sensor architecture is what makes the Mavic 3T the definitive tool for venue-scale urban photogrammetry.
Step 1: Pre-Mission Planning for Urban Venues
Airspace and Regulatory Clearance
Urban venue mapping typically falls within controlled airspace. Before you power on, confirm these items:
- Part 107 waiver status for your operating area (or equivalent local authorization)
- LAANC approval if operating near airports or heliports
- AES-256 encrypted flight logs enabled for compliance documentation
- BVLOS waiver if your venue footprint exceeds visual line-of-sight limits
- Local facility permission from venue management and any relevant authorities
GCP Placement Strategy
Ground Control Points are non-negotiable for survey-grade output. For a typical 40,000-seat stadium, plan for:
- Minimum 5 GCPs distributed across the venue footprint
- Additional checkpoints (3–4) placed independently to validate accuracy
- GCPs on stable, flat surfaces—avoid expansion joints, painted lines, or temporary structures
- RTK-corrected coordinates captured with a GNSS rover at each point
Pro Tip: Place at least one GCP on the roof level and one at ground level when mapping multi-story venue structures. Elevation diversity dramatically improves vertical accuracy in your photogrammetric model, often cutting Z-axis error from 8 cm to under 3 cm.
Step 2: Configuring the Mavic 3T for Venue Photogrammetry
Camera Selection and Settings
The Mavic 3T houses three sensors. Here's how each one serves your venue mapping mission:
| Sensor | Specification | Role in Venue Mapping |
|---|---|---|
| Wide Camera | 1/2" CMOS, 48MP, Mechanical Shutter | Primary photogrammetry capture—eliminates rolling shutter distortion |
| Zoom Camera | 1/2" CMOS, 48MP, 56× Hybrid Zoom | Facade detail, signage inspection, structural close-ups |
| Thermal Camera | 640 × 512, DFOV 61°, <50mK NETD | Thermal signature detection for HVAC audits, moisture intrusion, insulation gaps |
For photogrammetry missions, lock these settings on the wide camera:
- ISO: 100–200 (fixed, never auto)
- Shutter speed: 1/1000s minimum to freeze motion at mapping speed
- White balance: Sunny or Cloudy (fixed, never auto—consistency matters for stitching)
- Image format: JPEG + DNG (RAW backup protects you when processing reveals exposure issues)
- Mechanical shutter: Enabled (this is the Mavic 3T's secret weapon against the motion blur that plagues electronic shutter drones)
Why the Mechanical Shutter Changes Everything
Here's where the Mavic 3T separates itself from competitors. The Autel EVO II Pro V3 uses an electronic rolling shutter. At typical mapping speeds of 8–10 m/s, that rolling shutter introduces pixel-level skew across each frame. The distortion compounds during photogrammetric processing, inflating tie-point residuals and degrading your final orthomosaic.
The Mavic 3T's mechanical global shutter captures the entire frame simultaneously. Zero skew. Zero motion artifacts. Your processing software spends less time correcting distortion and more time building accurate geometry.
Step 3: Flight Execution—The Double-Grid Mission
Primary Nadir Coverage
For a standard venue mapping flight, configure a double-grid (crosshatch) mission in DJI Pilot 2:
- Altitude: 80–100m AGL (balances GSD and coverage efficiency)
- GSD target: 2.0–2.5 cm/px at 80m altitude with the wide camera
- Front overlap: 80%
- Side overlap: 70%
- Speed: 8 m/s (optimal for mechanical shutter cycling)
- Gimbal angle: -90° (pure nadir)
At these settings, the Mavic 3T's 45-minute flight time covers approximately 0.5 km² per battery—enough for most venue complexes in a single sortie.
Oblique Passes for 3D Modeling
If your deliverable includes a 3D mesh or textured model (common for event planning and renovation visualization), add oblique passes:
- Gimbal angle: -45°
- Orbit the venue perimeter at 60–70m AGL
- Overlap: 75% front, 65% side
- Capture all four cardinal directions for complete facade coverage
Expert Insight: The O3 transmission system on the Mavic 3T operates on both 2.4 GHz and 5.8 GHz bands simultaneously, auto-switching to maintain link integrity. In urban environments saturated with Wi-Fi interference—especially around venues with active network infrastructure—this dual-band architecture prevents the signal dropouts that single-band systems like the Skydio X10 can experience near dense RF environments. I've personally maintained solid telemetry while mapping a convention center surrounded by 200+ active access points.
Step 4: Thermal Layer Capture for Facility Audits
Venue operators increasingly request thermal signature overlays alongside standard orthomosaics. The Mavic 3T's 640 × 512 uncooled VOx thermal sensor makes this a single-platform operation.
Best Practices for Thermal Venue Mapping
- Fly thermal passes at dawn or dusk when ambient temperature differentials are most pronounced
- Set emissivity to 0.95 for general building materials (concrete, asphalt, glass)
- Use R-JPEG format to preserve full radiometric data for post-processing
- Altitude: 50–60m AGL for thermal—lower than your RGB pass to maximize thermal resolution
- Temperature range: High Gain mode (-20°C to 150°C) for building envelope analysis
The thermal data reveals HVAC inefficiencies, moisture intrusion beneath roofing membranes, and electrical hot spots in venue infrastructure—deliverables that transform a simple mapping job into a high-value facility audit.
Step 5: Post-Processing and Deliverable Export
Software Workflow
Process your Mavic 3T datasets with industry-standard photogrammetry platforms:
- DJI Terra: Native integration, automatic lens calibration, streamlined GCP import
- Pix4Dmatic: Superior for large venue datasets exceeding 2,000 images
- Agisoft Metashape: Maximum control over dense cloud generation and mesh quality
Typical Deliverable Accuracy
| Metric | Expected Result (with GCPs) | Without GCPs (RTK only) |
|---|---|---|
| Horizontal Accuracy (XY) | 1.5–2.5 cm | 3–5 cm |
| Vertical Accuracy (Z) | 2.0–3.5 cm | 5–8 cm |
| GSD (at 80m AGL) | 2.14 cm/px | 2.14 cm/px |
| Point Cloud Density | 400–600 pts/m² | 400–600 pts/m² |
| Processing Time (2,500 images) | 4–6 hours | 3–5 hours |
Technical Comparison: Mavic 3T vs. Competing Urban Mapping Platforms
| Feature | DJI Mavic 3T | Autel EVO II Pro V3 | Skydio X10 |
|---|---|---|---|
| Weight | 920g | 1,175g | 1,535g |
| Triple Sensor (RGB + Zoom + Thermal) | ✅ Yes | ❌ No (single sensor) | ✅ Yes |
| Mechanical Shutter | ✅ Yes | ❌ No | ❌ No |
| Max Flight Time | 45 min | 42 min | 35 min |
| Transmission Range | 15 km (O3) | 9 km | 6 km |
| Encryption | AES-256 | AES-256 | AES-256 |
| Hot-Swap Batteries | ✅ Yes | ❌ No | ❌ No |
| BVLOS Capability | ✅ Supported | Limited | ✅ Supported |
| Thermal Resolution | 640 × 512 | N/A (requires separate drone) | 640 × 512 |
| Photogrammetry GSD at 80m | 2.14 cm/px | 1.89 cm/px | 2.4 cm/px |
The Autel achieves a marginally better GSD, but the rolling shutter penalty erases that advantage in real-world photogrammetric accuracy. The Skydio X10 matches the triple-sensor layout but sacrifices 10 minutes of flight time and 9 km of transmission range—significant compromises for large-venue urban operations.
Common Mistakes to Avoid
1. Skipping GCPs because you have RTK. RTK provides excellent relative accuracy, but absolute accuracy without ground truth verification can drift 5–8 cm in urban canyons where GNSS multipath is severe. Always deploy GCPs for client-facing deliverables.
2. Flying too fast for the overlap settings. At 80% front overlap and 10 m/s, the mechanical shutter cycles at its upper limit. Drop to 8 m/s to guarantee consistent frame capture. One missed frame creates a gap that destroys local accuracy.
3. Ignoring thermal calibration. The Mavic 3T's thermal sensor requires a flat-field correction (FFC) every 5–7 minutes during flight. Enable auto-FFC in settings. Skipping this introduces thermal drift that renders your radiometric data unreliable.
4. Processing RGB and thermal data in the same project. Separate your photogrammetry and thermal workflows. Process the RGB orthomosaic first, then overlay the thermal layer using GIS software. Mixing them in a single photogrammetric project introduces alignment errors due to parallax between the two sensors.
5. Neglecting facade obliques for 3D venue models. A nadir-only dataset produces flat, textureless vertical surfaces. Architects and event planners need full 3D models with textured facades. Budget an extra battery for oblique capture—it doubles the value of your deliverable.
Frequently Asked Questions
Can the Mavic 3T map a large stadium complex in a single battery?
Yes, in most cases. At 80m AGL with 80/70 overlap and 8 m/s speed, the Mavic 3T covers roughly 0.5 km² on a single 45-minute battery. A standard 60,000-seat stadium footprint (approximately 0.15 km² including parking structures) fits comfortably within that envelope. For complexes exceeding 0.4 km², hot-swap batteries let you resume the mission within 30 seconds without re-initializing the flight plan.
How does the O3 transmission system handle urban RF interference during venue mapping?
The O3 system transmits on 2.4 GHz and 5.8 GHz simultaneously, dynamically allocating bandwidth to whichever channel experiences less interference. In testing across 15+ urban venue mapping projects, I've recorded zero transmission dropouts—even when operating within 200m of active 5G cell towers and dense Wi-Fi networks. The system maintains 1080p/30fps live feed at distances exceeding 3 km in urban environments, though most venue mapping missions operate well within 1 km line-of-sight.
What accuracy can I promise clients for venue mapping deliverables?
With properly surveyed GCPs and the workflow described above, you can confidently guarantee sub-3 cm horizontal accuracy and sub-4 cm vertical accuracy. These numbers meet or exceed the requirements for architectural renovation planning, ADA compliance surveys, structural assessment, and event logistics modeling. Always include your GCP residual report and checkpoint validation data in client deliverables—it builds trust and justifies premium pricing for your mapping services.
Ready for your own Mavic 3T? Contact our team for expert consultation.