Mapping Wildlife with Mavic 3T in Mountains
Mapping Wildlife with Mavic 3T in Mountains
META: Learn how to map wildlife in mountain terrain using the DJI Mavic 3T. Expert tutorial covers thermal signatures, GCP placement, and BVLOS tips for accurate surveys.
By James Mitchell | Drone Survey Specialist & Certified Thermographer
TL;DR
- The Mavic 3T's wide-angle thermal camera detects thermal signatures of wildlife across rugged mountain terrain, even in dense canopy and low-visibility conditions.
- Proper GCP placement and photogrammetry workflows are essential to produce georeferenced habitat maps from high-altitude survey flights.
- Electromagnetic interference (EMI) at elevation is a real threat—antenna positioning and O3 transmission tuning keep your link stable during BVLOS operations.
- Hot-swap batteries and pre-planned flight paths allow you to cover vast alpine survey zones without data gaps.
Why Mountain Wildlife Mapping Demands a Thermal-Equipped Drone
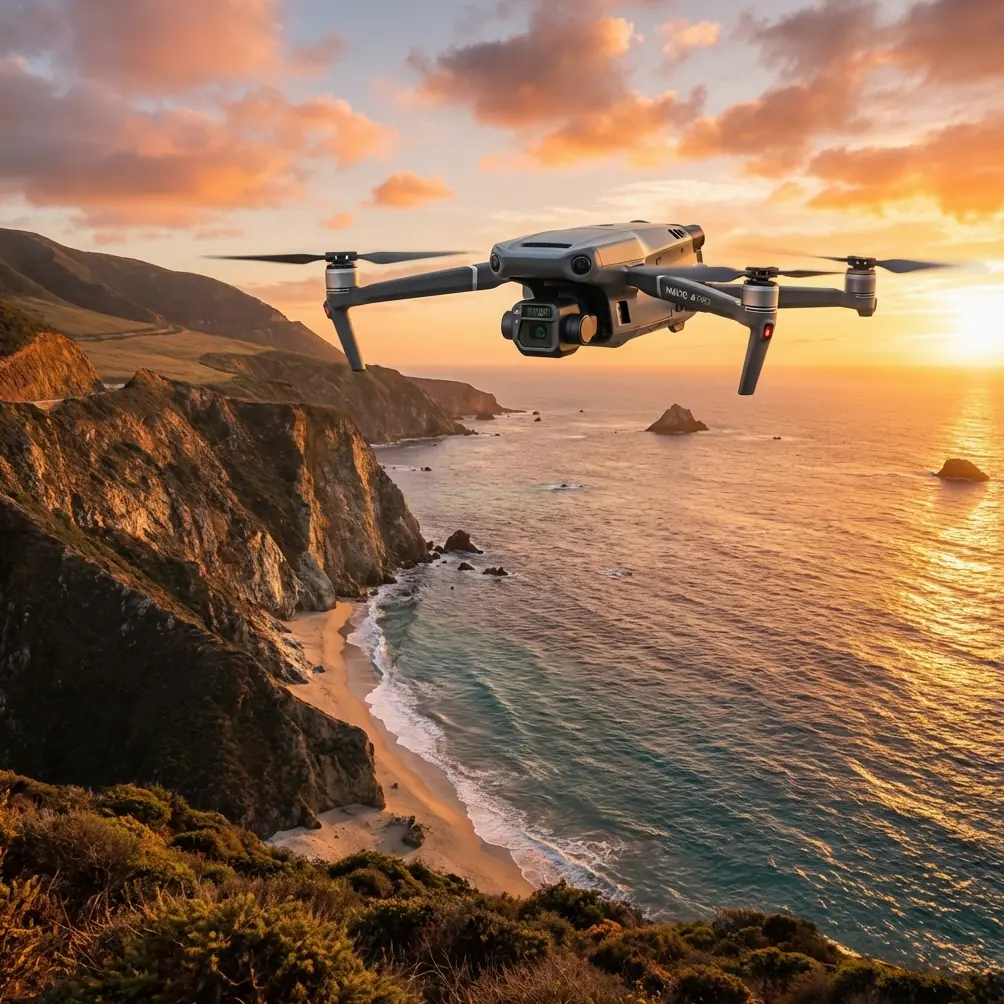
Tracking endangered species across mountain ecosystems is one of the most technically demanding applications in drone survey work. Traditional visual-spectrum drones miss animals hidden beneath tree cover, and manned aircraft disturb the very populations you're trying to study. The Mavic 3T solves both problems with a 640 × 512 thermal sensor alongside a 48 MP wide-angle camera and a 12 MP zoom camera—all packed into a platform light enough to launch from a ridgeline.
This tutorial walks you through every step of planning, executing, and processing a mountain wildlife survey with the Mavic 3T. You'll learn how to handle the electromagnetic interference that plagues high-altitude flights, set ground control points on uneven terrain, and turn raw thermal data into publishable habitat density maps.
Step 1: Pre-Mission Planning for Alpine Terrain
Defining Your Survey Area
Before you charge a single battery, define your area of interest (AOI) using satellite imagery and topographic data. Mountain wildlife surveys typically cover 2–10 km² per mission day, depending on elevation change and canopy density.
Key planning considerations:
- Elevation range: The Mavic 3T operates at a max altitude of 6,000 m ASL, but air density drops roughly 12% per 1,000 m, reducing flight time.
- Wind modeling: Use forecast tools like Windy or UAV Forecast to check wind speeds at your target altitude. The Mavic 3T resists winds up to 12 m/s, but gusts above ridgelines can exceed that.
- Species behavior windows: Most mammals produce the strongest thermal signature contrast during pre-dawn and post-dusk hours, when ambient surface temperatures are lowest.
- Legal requirements: Confirm whether your survey zone requires BVLOS waivers or wildlife disturbance permits from local authorities.
Flight Path Design
Use DJI Pilot 2 to create automated grid missions. For thermal wildlife detection, set your flight altitude to 80–120 m AGL (above ground level). This provides a thermal ground sampling distance (GSD) of approximately 14–22 cm/pixel, sufficient to identify medium-to-large mammals like deer, wolves, or bears.
Set your overlap to 75% frontal and 65% side overlap for photogrammetry. This redundancy is critical on uneven mountain terrain where altitude corrections cause variable GSD.
Pro Tip: Enable the Mavic 3T's terrain follow mode and import a DEM (Digital Elevation Model) of your survey area. Without terrain follow, a 300 m elevation change across your grid could render half your thermal data unusable due to inconsistent resolution.
Step 2: Handling Electromagnetic Interference at Altitude
Here's where mountain surveys get tricky. During a recent elk census in the Northern Rockies, I lost telemetry at 1.8 km range—well within the Mavic 3T's rated 15 km O3 transmission limit. The culprit was electromagnetic interference from a nearby radio repeater station sitting on a neighboring peak.
Diagnosing and Solving EMI Issues
EMI sources in mountain environments include:
- Communication towers and repeaters on summits
- Power transmission lines crossing valleys
- Geological mineral deposits (iron-rich rock formations)
- Other drone operators sharing the same frequency band
The fix is methodical antenna adjustment. The Mavic 3T's RC Pro Enterprise controller uses dual antennas that should be oriented perpendicular to the drone's position for maximum signal strength. In practice, this means:
- Face the flat sides of both antennas toward the drone, not the edges.
- Elevate your launch point above any metal structures, vehicles, or geological obstructions.
- Switch the O3 transmission channel from Auto to a manually selected channel with the lowest interference—check the channel quality bars in DJI Pilot 2.
- Reduce your transmission power if you're operating within 500 m, which actually decreases signal reflection and multipath interference in narrow valleys.
After repositioning my antennas and manually selecting a clean channel, I recovered full 1080p live feed with less than 200 ms latency for the remainder of the mission. The O3 system's AES-256 encryption also ensured data integrity wasn't compromised during the interference event.
Expert Insight: If you consistently lose signal behind a ridge, don't just increase power. Instead, position a visual observer on the ridge as a relay reference point, and plan your flight path so the drone maintains line-of-sight with the controller during the most data-critical transects. EMI won't be solved by raw power alone—geometry matters more.
Step 3: Ground Control Point (GCP) Strategy on Uneven Terrain
Photogrammetry without GCPs yields relative accuracy. For wildlife habitat mapping that needs to correlate with existing ecological datasets, you need absolute accuracy of ±5 cm horizontal and ±10 cm vertical. GCPs make that possible.
Placement Guidelines
- Deploy a minimum of 5 GCPs across your survey area, with at least 1 in each quadrant and 1 near the center.
- Use high-contrast checkerboard targets (60 × 60 cm minimum) that are visible in both the RGB and thermal spectrum.
- Survey each GCP with an RTK GNSS receiver for centimeter-level coordinates.
- On steep slopes, anchor targets with rocks or stakes—mountain wind will relocate an unsecured target in minutes.
- Avoid placing GCPs under canopy. If tree cover exceeds 40%, use natural clearings, rocky outcrops, or trail intersections.
Step 4: Flight Execution and Battery Management
Hot-Swap Battery Protocol
The Mavic 3T delivers approximately 45 minutes of flight time under ideal conditions. At altitude, expect 33–38 minutes due to thinner air requiring higher rotor RPMs. For a 5 km² survey area, you'll need 4–6 batteries per session.
Hot-swap batteries enable rapid turnaround without powering down the controller or losing your mission progress. Here's the efficient workflow:
- Land the drone with >15% battery remaining (never drain to critical).
- Power off the drone.
- Swap the battery within 60 seconds to maintain component temperature in cold alpine conditions.
- Power on and resume the mission from the last captured waypoint.
- Store depleted batteries in an insulated case—lithium cells lose voltage faster in cold.
Step 5: Post-Processing Thermal Data into Habitat Maps
After the flight, transfer your data to processing software. The Mavic 3T outputs R-JPEG thermal images with embedded temperature data.
Recommended Processing Workflow
- Photogrammetry stitching: Use Pix4Dmapper or DJI Terra to create orthomosaics from both the RGB and thermal datasets.
- Thermal signature isolation: Set detection thresholds based on ambient temperature. Wildlife typically registers 8–15°C above ambient depending on body mass and fur density.
- Classification: Use GIS software to classify thermal anomalies by size, shape, and heat intensity—separating animals from sun-warmed rocks or water sources.
- Density mapping: Overlay confirmed animal detections onto your georeferenced orthomosaic to produce species density heat maps.
Mavic 3T vs. Alternatives for Wildlife Thermal Surveys
| Feature | Mavic 3T | Matrice 30T | Autel EVO II Dual 640T |
|---|---|---|---|
| Thermal Resolution | 640 × 512 | 640 × 512 | 640 × 512 |
| RGB Camera | 48 MP | 48 MP | 50 MP |
| Max Flight Time | 45 min | 41 min | 39 min |
| Weight | 920 g | 3,770 g | 1,280 g |
| O3 Transmission Range | 15 km | 15 km | 15 km |
| Terrain Follow | Yes (DEM-based) | Yes | Limited |
| Portability for Alpine Use | Excellent | Moderate | Good |
| AES-256 Encryption | Yes | Yes | No |
The Mavic 3T's 920 g weight makes it the standout choice for backcountry wildlife work where every gram in your pack counts. The Matrice 30T offers more payload flexibility but at 4× the weight—a significant penalty when you're hiking to a launch site at 3,000 m elevation.
Common Mistakes to Avoid
- Flying during midday heat: Ambient ground temperatures peak between 11:00 and 14:00, compressing the thermal contrast between wildlife and terrain. Your detection rate drops by as much as 60%.
- Ignoring wind chill on batteries: A -5°C ambient temperature with 30 km/h wind creates effective conditions closer to -15°C, which can trigger low-voltage warnings prematurely. Pre-warm batteries to >20°C before flight.
- Skipping GCPs to save time: Without ground control, your photogrammetry output may drift 1–3 m from true position, making it incompatible with multi-year population tracking datasets.
- Setting thermal gain too high: Over-amplified thermal imagery creates false positives—every sun-warmed rock becomes a "detection." Calibrate gain to your specific species' expected thermal signature.
- Neglecting AGL consistency: Flying a flat grid over a mountain slope means your actual AGL varies wildly. A planned 100 m AGL flight over a 200 m slope could put you at 300 m AGL at the valley floor, halving your thermal resolution there.
Frequently Asked Questions
Can the Mavic 3T detect small animals like rabbits or foxes in mountain terrain?
Yes, but detection reliability depends on altitude and thermal contrast. At 80 m AGL, the thermal GSD is approximately 14 cm/pixel, which can resolve animals as small as 2–3 kg during optimal thermal contrast windows (pre-dawn). Smaller species require lower flight altitudes of 40–60 m AGL, which reduces area coverage per battery.
How does AES-256 encryption protect my wildlife survey data?
The Mavic 3T's AES-256 encryption secures the video transmission link between the drone and controller. For endangered species surveys, this prevents unauthorized interception of live thermal feeds that could reveal animal locations to poachers. The encryption runs natively on the O3 transmission system with zero impact on latency or video quality.
Is BVLOS operation necessary for mountain wildlife mapping?
For surveys exceeding 2 km², BVLOS capability becomes practically essential. Mountain ridges, valleys, and forest cover make continuous visual line-of-sight nearly impossible. The Mavic 3T's 15 km O3 range and automated waypoint missions technically support BVLOS, but you must obtain the appropriate regulatory waiver and deploy visual observers at strategic points along the flight path.
The Mavic 3T transforms mountain wildlife surveys from multi-day manned expeditions into precise, repeatable drone operations. Its combination of thermal imaging, lightweight portability, and robust transmission makes it the best tool currently available for alpine ecological fieldwork.
Ready for your own Mavic 3T? Contact our team for expert consultation.