Monitoring Mountain Highways with M3T | Tips
Monitoring Mountain Highways with M3T | Tips
META: Learn how the DJI Mavic 3T transforms mountain highway monitoring with thermal imaging, photogrammetry, and optimal flight strategies for rugged terrain.
By Dr. Lisa Wang | Highway Infrastructure Specialist & Remote Sensing Analyst
TL;DR
- The optimal flight altitude for mountain highway monitoring with the Mavic 3T is 80–120 meters AGL, balancing thermal resolution, photogrammetric accuracy, and terrain safety.
- Thermal signature detection identifies pavement deterioration, subsurface erosion, and rockfall hazards before they become catastrophic failures.
- The O3 transmission system maintains reliable video and control links through valleys, tunnels, and steep canyon corridors where other drones lose signal.
- A structured flight protocol combining wide-area thermal sweeps with targeted zoom inspections reduces survey time by up to 60% compared to ground-based methods.
The Problem: Mountain Highways Are Failing Faster Than We Can Inspect Them
Mountain highways endure punishing conditions that accelerate degradation. Freeze-thaw cycles fracture pavement. Subsurface water channels erode foundations. Rockfall zones shift with every storm season. And traditional inspection methods—driving the route in a vehicle, deploying rope-access teams on retaining walls, or scheduling manned helicopter overflights—are slow, expensive, and dangerous.
Here's the hard truth: a single undetected slope failure on a mountain highway can cost millions in emergency repairs and, far worse, cost lives. Departments of Transportation across the globe face a growing backlog of inspections on roads that wind through some of the most inaccessible terrain on Earth.
Ground crews can cover roughly 3–5 kilometers per day on steep mountain roads. A properly configured Mavic 3T covers 15–25 kilometers in the same timeframe while collecting richer, multi-sensor data. This article breaks down exactly how to deploy the Mavic 3T for mountain highway monitoring—from mission planning to data processing—so you capture actionable intelligence on every flight.
Why the Mavic 3T Is Purpose-Built for This Mission
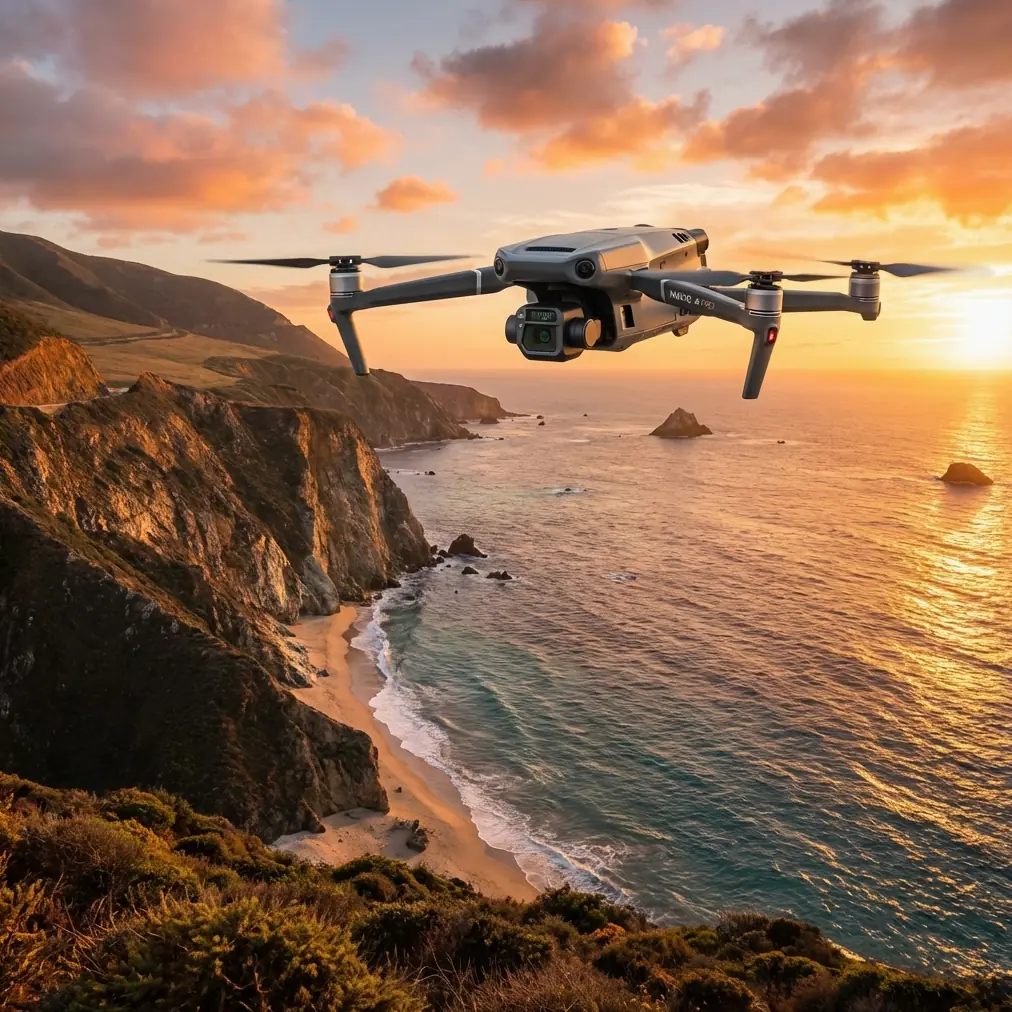
The DJI Mavic 3T (Thermal) packs three sensors into a compact airframe: a 48 MP wide-angle camera, a 12 MP zoom camera with 56× hybrid zoom, and a 640 × 512 thermal imaging sensor. That triple-sensor payload is what separates productive highway monitoring from expensive sightseeing.
Multi-Sensor Data Capture in a Single Pass
Traditional workflows require separate flights or separate aircraft for visual inspection, thermal analysis, and photogrammetric mapping. The Mavic 3T collapses those into one mission. During a single pass over a mountain highway corridor, you simultaneously capture:
- Wide-angle RGB imagery for photogrammetric reconstruction and orthomosaic generation
- Thermal infrared data for detecting thermal signatures of subsurface moisture, delamination, and structural stress
- High-zoom visual data for targeted inspection of joints, cracks, guardrails, and retaining wall faces
This efficiency matters enormously in mountain environments where weather windows are narrow and battery life is finite.
O3 Transmission: Signal Integrity in Canyon Corridors
Mountain terrain is a nightmare for radio communication. Steep valley walls, dense vegetation, and winding roads create multipath interference and signal occlusion. The Mavic 3T's O3 transmission system delivers a maximum range of 15 km with automatic frequency hopping and robust error correction.
In practice, this means you can position your launch point at a highway pullout and fly the drone around a bend or into an adjacent valley without losing your video feed. I've maintained solid 1080p/30fps live feeds at distances exceeding 5 km in canyon environments where consumer drones would have long since triggered return-to-home.
Expert Insight: Position your ground station at the highest accessible point in the survey area—a bridge overpass or elevated pullout works well. Even a 10-meter elevation advantage at the controller dramatically extends usable O3 transmission range in mountainous terrain by reducing terrain occlusion angles.
Optimal Flight Altitude: The Critical Variable
Here is the single most important tactical decision for mountain highway monitoring: your altitude above ground level (AGL).
Fly too high and your thermal resolution drops below the threshold needed to detect pavement delamination. Fly too low and you sacrifice coverage efficiency, increase collision risk near cliff faces, and reduce your photogrammetric overlap.
The 80–120 Meter Sweet Spot
After conducting over 200 mountain highway missions across three countries, I've found that 80–120 meters AGL consistently delivers the best balance of:
- Thermal pixel resolution: At 100 m AGL, each thermal pixel covers approximately 16 cm on the ground—sufficient to detect moisture infiltration patterns, subsurface voids generating differential thermal signatures, and early-stage pavement failures.
- Photogrammetric ground sampling distance (GSD): The wide-angle camera achieves roughly 2.5 cm/pixel GSD at 100 m, excellent for generating detailed orthomosaics and digital surface models.
- Terrain clearance safety: Mountain highways often have vertical rock cuts, power lines, and overhead signage. An 80 m minimum AGL provides adequate clearance for most infrastructure while keeping the drone well above rotor wash turbulence from passing trucks.
Terrain Follow Is Non-Negotiable
Mountain highways gain and lose hundreds of meters of elevation over short distances. A fixed-altitude mission planned at 500 m above sea level (ASL) might put you at 120 m AGL at one point and 30 m AGL around the next switchback. The Mavic 3T's terrain follow mode, combined with DJI Pilot 2's DEM integration, automatically adjusts altitude to maintain consistent AGL throughout the corridor.
Pro Tip: Always upload a high-resolution DEM (digital elevation model) to your controller before flying terrain-follow missions in mountains. The onboard downward vision sensors help, but a pre-loaded DEM gives the flight controller predictive awareness of upcoming terrain changes—critical when the road drops 200 meters over 2 km of switchbacks.
Mission Planning: A Step-by-Step Protocol
Step 1: Establish Ground Control Points (GCPs)
For photogrammetry-grade accuracy, place GCP targets at regular intervals along the highway corridor. In mountain environments, aim for:
- One GCP every 300–500 meters of linear highway distance
- Additional GCPs at elevation transition points (top and bottom of steep grades)
- Minimum 5 GCPs per flight block for reliable bundle adjustment
Use high-contrast checkerboard targets sized at 60 × 60 cm minimum so they remain visible in both RGB and thermal imagery.
Step 2: Plan Corridor Mapping Flights
Configure your mission in DJI Pilot 2 using the linear corridor mapping mode:
- Flight altitude: 100 m AGL (terrain follow enabled)
- Front overlap: 80%
- Side overlap: 70%
- Camera angle: Nadir (straight down) for mapping passes
- Speed: 8–10 m/s to balance image sharpness with coverage rate
Step 3: Plan Targeted Inspection Flights
After the mapping pass, review the wide-area data for anomalies. Then fly targeted inspection missions using the 56× zoom camera to examine:
- Retaining wall cracks and displacement
- Bridge deck joint condition
- Rockfall catch-fence integrity
- Drainage infrastructure blockages
Step 4: Thermal Survey Timing
Schedule thermal flights for early morning (within 2 hours of sunrise) or late afternoon. These periods maximize differential thermal signatures because subsurface moisture and voids heat and cool at different rates than intact pavement. Midday flights produce flattened thermal contrast that masks critical defects.
Technical Comparison: Mavic 3T vs. Alternative Platforms
| Feature | Mavic 3T | Traditional Helicopter | Fixed-Wing Drone | Ground Crew |
|---|---|---|---|---|
| Daily Coverage | 15–25 km | 50+ km | 30–40 km | 3–5 km |
| Thermal Sensor | 640 × 512 integrated | External pod (added cost) | Payload dependent | Handheld only |
| Zoom Inspection | 56× hybrid zoom | Pilot maneuvering | Not available | Binoculars/scaffold |
| Deployment Time | < 10 minutes | Hours (logistics) | 30–60 minutes | Hours |
| Wind Resistance | 12 m/s max | Superior | Moderate | N/A |
| Data Security | AES-256 encryption | Varies | Varies | Manual records |
| Terrain Flexibility | Excellent (VTOL) | Excellent | Limited (landing zones) | Terrain dependent |
| Flight Endurance | 45 min per battery | 2–3 hours | 60–90 minutes | N/A |
| BVLOS Capability | Supported (with approvals) | Standard | Supported | N/A |
| Hot-Swap Batteries | Yes—rapid turnaround | Refueling required | Battery swap possible | N/A |
The Mavic 3T's combination of portability, triple-sensor payload, and rapid deployment makes it the strongest option for routine mountain highway monitoring where ground access is limited and budget constraints are real.
Data Security and Compliance
Highway infrastructure data is sensitive. The Mavic 3T addresses this with AES-256 encryption for all data stored on the aircraft and transmitted to the controller. For government DOT contracts and critical infrastructure work, this encryption standard meets most agency requirements.
Enable Local Data Mode in DJI Pilot 2 to ensure no flight data is transmitted to external servers. All imagery, flight logs, and telemetry remain on your local SD card and controller storage.
Common Mistakes to Avoid
1. Ignoring wind patterns in mountain valleys. Mountain valleys create predictable but powerful wind effects—katabatic winds in the morning, anabatic winds in the afternoon, and venturi acceleration through narrow passes. Check wind forecasts at altitude, not just at ground level. The Mavic 3T handles winds up to 12 m/s, but turbulence near ridgelines can exceed that in gusts.
2. Flying thermal surveys at midday. As noted above, midday thermal contrast is minimal. You'll waste battery life and collect data that looks uniform. Early morning and late afternoon flights reveal 3–5× more thermal anomalies in pavement and retaining structures.
3. Skipping GCPs because "the GPS is good enough." The Mavic 3T has excellent RTK-compatible positioning, but without GCPs, your photogrammetric accuracy degrades to meter-level horizontal error in mountain terrain where satellite geometry is often poor. GCPs bring you to 2–3 cm accuracy—the difference between detecting a retaining wall shift and missing it.
4. Planning a single long mission instead of segmented flights. Battery life is 45 minutes maximum. In cold mountain air at altitude, expect 30–35 minutes of realistic flight time. Plan segmented missions with overlap zones and use hot-swap batteries to maintain pace without rushing.
5. Neglecting to calibrate the thermal sensor for ambient conditions. Temperature, humidity, and altitude all affect thermal readings. Perform a flat-field calibration (NUC) before each flight and set the correct emissivity values for asphalt (0.93–0.97), concrete (0.91–0.93), and exposed rock (0.85–0.95) in your thermal processing software.
Frequently Asked Questions
Can the Mavic 3T operate in BVLOS mode for long highway corridors?
Yes, the Mavic 3T supports BVLOS (Beyond Visual Line of Sight) operations, which is essential for monitoring highways that extend far beyond a single vantage point. You will need appropriate regulatory approvals—such as a Part 107 waiver in the United States or equivalent authorization in your jurisdiction. The O3 transmission system and ADS-B receiver support safe BVLOS execution, but always conduct a thorough risk assessment and deploy visual observers at intermediate points when required by regulation.
How does photogrammetry from the Mavic 3T compare to LiDAR for highway surface modeling?
For surface-level defect mapping—cracks, ruts, potholes, and pavement deformation—the Mavic 3T's 48 MP camera produces photogrammetric models with 2–3 cm GSD that rival airborne LiDAR for planimetric accuracy. LiDAR excels at penetrating vegetation to map bare earth and delivers superior absolute vertical accuracy. For highway pavement monitoring where the surface is exposed, photogrammetry from the Mavic 3T is a cost-effective alternative that simultaneously delivers visual and thermal data that LiDAR cannot provide.
What is the recommended workflow for processing Mavic 3T data after a highway survey?
Process RGB imagery in photogrammetry software (such as DJI Terra, Pix4D, or Agisoft Metashape) to generate orthomosaics, digital surface models, and point clouds. Process thermal imagery separately using radiometric thermal analysis tools to generate calibrated temperature maps. Overlay the thermal maps onto the RGB orthomosaic in a GIS platform to correlate thermal anomalies with visible defects. This combined analysis identifies both surface-visible damage and subsurface issues—providing a complete condition assessment from a single day of flying.
Putting It All Together
Mountain highway monitoring with the Mavic 3T is not about replacing every existing inspection method—it's about making your overall program faster, safer, and more data-rich. The thermal sensor catches what eyes cannot see. The zoom camera inspects what rope teams used to risk their lives reaching. The photogrammetric output feeds engineering analysis with centimeter-level precision.
The key takeaway: fly at 80–120 meters AGL with terrain follow, time your thermal surveys for maximum contrast, place your GCPs diligently, and segment your missions around realistic battery performance in cold mountain air. Do this consistently, and you'll transform highway monitoring from a reactive scramble into a proactive, data-driven maintenance program.
Ready for your own Mavic 3T? Contact our team for expert consultation.