How to Survey Complex Terrain Fields With the Mavic 3T
How to Survey Complex Terrain Fields With the Mavic 3T: A Practical Workflow That Starts Before You Fly
META: Learn a field-tested Mavic 3T workflow for surveying difficult terrain, improving image quality, managing interference, and producing cleaner thermal and visual data for agricultural and land assessment work.
By Dr. Lisa Wang, Specialist
Surveying fields in broken terrain is rarely a straight-line drone mission. Slopes distort perspective. Tree lines interrupt signal paths. Wet ground, rock faces, irrigation hardware, and scattered structures create uneven thermal behavior and visual clutter. The Mavic 3T is often discussed for its sensor package, but in real fieldwork, useful results come from process rather than spec sheets alone.
That process begins with a simple idea borrowed from mobile photography post-production: standardize what you do after capture. One recent photography reference put it plainly. No matter what phone is used, image editing can follow a repeatable sequence. First, recompose by cropping away distractions, leveling the horizon, and making the subject stand out. Second, correct light and shadow by adjusting exposure, contrast, highlights, and shadows to fix dull, blown-out, or underexposed images. Those two steps may sound basic, but for Mavic 3T field surveys, they are operationally significant.
Why? Because terrain work creates exactly the kind of visual inconsistency that damages interpretation. A field edge shot from a side slope may include too much scrub, road, or sky. A thermal and RGB pass captured under mixed cloud can look flat in one zone and harsh in another. If your workflow does not include deliberate secondary composition and light calibration, even a technically successful flight can produce data that is harder to trust.
Start with the survey objective, not the aircraft menu
When using the Mavic 3T in agricultural and land survey scenarios, I advise crews to define the output before takeoff. Are you trying to:
- identify drainage stress across irregular rows,
- compare thermal signature changes on different elevations,
- inspect crop vigor along terraces,
- document erosion channels,
- support a photogrammetry model for planning access routes,
- or validate GCP placement before a larger mapping campaign?
Each goal changes how you fly and how you process.
For example, if your end product is a stitched orthomosaic for photogrammetry, horizon discipline matters more than many teams realize. The mobile photography reference specifically emphasizes keeping the horizon level during the “secondary composition” stage. In drone survey work, that translates into two practical habits. First, maintain consistent gimbal attitude throughout collection. Second, review edge frames for tilt before committing to full processing. Slight horizon irregularities may seem harmless in single-image review, but over a large field in rolling terrain they can complicate tie-point consistency and visual interpretation.
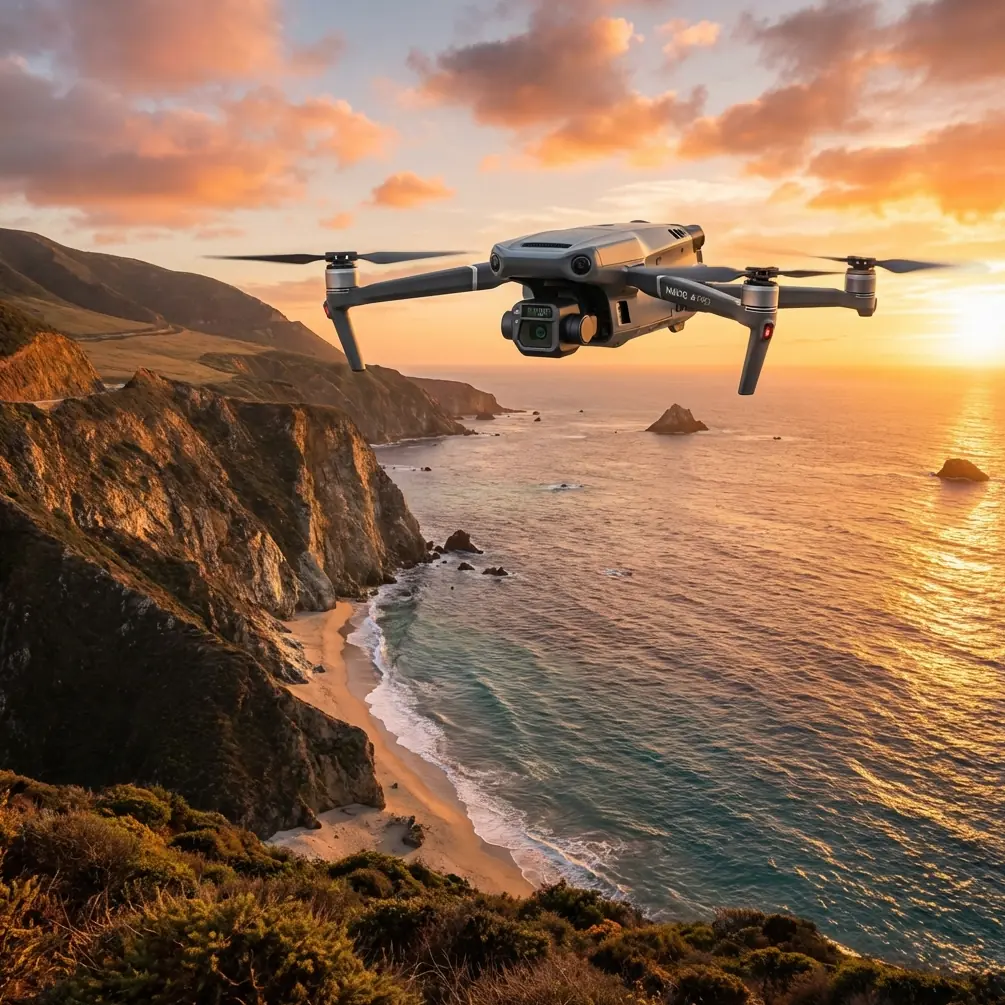
Why the Mavic 3T works well in complex fields
The Mavic 3T is especially useful when a site demands both quick visual context and thermal confirmation. In complex terrain, what you see in RGB and what you infer from heat can diverge sharply. A cooler patch might indicate moisture retention on a shaded slope, not necessarily a plant health issue. A warmer drainage path might be exposed soil rather than system failure. The ability to compare views in the same operational window is what makes the aircraft valuable.
Its O3 transmission link is also relevant here. In hilly fields, maintaining stable video becomes difficult as terrain blocks line of sight and local infrastructure introduces electromagnetic noise. Reliable transmission does not eliminate interference, but it gives the operator more margin when terrain is working against the signal path. If your workflow includes handling sensitive site imagery, AES-256 transmission security also matters for commercial operators documenting farms, private estates, utility corridors, or research plots where data governance is part of the job.
A practical pre-flight routine for broken ground
Before launch, I use a four-part check.
1. Segment the site by terrain behavior
Do not treat the whole field as one uniform block. Break it into ridge tops, shaded slopes, low wet areas, access corridors, and obstruction-heavy sections. This improves battery planning and makes later comparison more meaningful.
2. Define your primary capture mode
If the main output is thermal anomaly review, schedule flights when surface contrast is useful and stable. If photogrammetry is the priority, favor lighting conditions that reduce harsh shadows and preserve visible texture without excessive glare.
3. Plan GCP visibility
If you are using GCPs, place them where they remain visually distinct despite slope changes and vegetation intrusion. In rough terrain, GCPs near grade breaks can disappear from key angles. That forces avoidable rework.
4. Anticipate interference zones
This is where many otherwise competent crews get sloppy. Pump stations, buried power infrastructure, metal fencing, nearby communications equipment, and even parked machinery can create localized signal challenges. Mark those sectors before takeoff.
Handling electromagnetic interference with antenna adjustment
The narrative around interference often gets reduced to “move farther away.” In the field, that is not always possible. With the Mavic 3T, a smarter response is to actively manage controller orientation and antenna alignment as the aircraft changes position relative to terrain.
A few principles matter:
- Do not point antenna tips directly at the aircraft. The sides of the antenna pattern are typically more effective than the ends.
- As the drone crosses behind a berm, tree line, or terrace edge, rotate your body and controller to preserve the cleanest possible signal path.
- If the aircraft is operating low on the far side of a slope, gain elevation yourself when safe and practical. A few meters of operator height can noticeably improve link quality.
- Avoid standing next to vehicles, large metal gates, or utility cabinets during critical mapping passes.
This sounds simple, but in complex terrain it can be the difference between smooth data collection and fragmented flights. O3 transmission gives you a strong foundation, yet terrain-induced masking is still real. The operator’s antenna discipline often determines whether a mission stays efficient.
If your team is building a repeatable field workflow and wants to compare setup notes with another operator, I often suggest using this direct WhatsApp field support link during planning rather than improvising onsite.
Capture for analysis, then process for clarity
This is where the mobile photography reference becomes unexpectedly useful for Mavic 3T work.
The first reference detail is cropping to remove messy background and emphasize the subject. In field surveying, that is not aesthetic vanity. It is analytical cleanup. A frame cluttered with access roads, hedgerows, unrelated structures, or bright sky can distract from the actual feature under review. When reviewing thermal signature patterns, excess background can also skew how quickly a human interpreter notices meaningful contrast. Secondary composition helps isolate the field zone, irrigation segment, drainage cut, or stressed crop block that matters.
The second reference detail is light and shadow correction through exposure, contrast, highlights, and shadows. Again, this is not cosmetic. In visual survey documentation, poor tonal balance hides detail. If an image looks washed out, the subtle edge of erosion, standing water, or crop inconsistency may not read clearly. If highlights are blown, reflective surfaces and dry soil can mask context. If shadows are crushed, lower-slope plant conditions disappear. A standardized tonal correction pass creates more consistent interpretation across the mission set.
The source specifically mentions correcting photos that appear gray, overexposed, or underexposed. Those exact failure modes are common in field surveys. Gray-looking files often arise under flat cloud or haze. Overexposure can occur when bright soil or reflective water occupies too much of the frame. Underexposure appears when flying against shadowed embankments or dark vegetation. Building these checks into your workflow means your reporting becomes more defensible.
My recommended Mavic 3T post-flight sequence
For complex terrain field work, I use this order:
Step 1: Triage the mission by zone
Sort files by ridge, mid-slope, valley, and infrastructure-adjacent sections. This preserves terrain logic.
Step 2: Secondary composition
Crop aggressively where needed. Remove dead space. Straighten the horizon if the image will be reviewed by agronomists, land managers, or clients who need clean orientation cues. If a specific irrigation line or stressed band is the subject, frame it that way.
Step 3: Tonal normalization
Adjust exposure and contrast first. Then refine highlights and shadows. The reference source lists these controls in a standardized flow, and that order works because it stabilizes the image before fine tuning. You are aiming for interpretability, not stylization.
Step 4: Cross-check thermal and RGB context
Do not read thermal output in isolation. Compare suspect thermal zones against visual evidence such as bare soil, shading, water accumulation, or canopy variation.
Step 5: Validate mapping assets
If the survey supports photogrammetry, inspect image consistency before processing. Check overlap quality, horizon stability, and GCP visibility.
Step 6: Archive securely
Commercial site data should be handled with the same discipline as collection. AES-256-secured transmission is useful in operation, but file storage and sharing procedures must be equally controlled afterward.
Battery strategy matters more in difficult topography
Complex fields punish poor battery planning. Climbing over elevation changes, repositioning around obstacles, and repeating partial runs after signal degradation all consume time. Hot-swap batteries are not just a convenience in this environment. They reduce downtime between segmented flights and help preserve mission consistency, especially when you need to revisit a specific terrain slice under similar conditions.
I recommend assigning each battery set to a terrain block rather than flying until arbitrary percentage thresholds force an unscheduled landing. That way, ridge sections and lowland sections can be reviewed as coherent data groups.
What about BVLOS planning?
For civilian commercial operations, BVLOS discussions should stay tightly aligned with local regulations, company approvals, and risk controls. In practical terms, complex terrain is one of the strongest arguments for conservative mission design. Even where advanced operations are allowed, broken ground, vegetation, and structures can degrade situational awareness quickly. The Mavic 3T may be capable, but capability does not replace disciplined line-of-sight planning, observer use where appropriate, and sensible segmentation of the site.
The hidden benefit of a standardized editing workflow
Most teams think of editing as the final polish. In reality, it feeds back into better flying.
Once crews adopt a repeatable review process based on secondary composition and light calibration, they start noticing recurring capture errors:
- too much irrelevant sky in slope images,
- horizon drift during lateral passes,
- underexposed low-angle terrain faces,
- inconsistent framing of GCP areas,
- cluttered thermal context around the true target zone.
That feedback changes future flight behavior. The result is not just prettier files. It is cleaner evidence.
For Mavic 3T operators surveying fields in complex terrain, that is the difference that matters. The aircraft gives you thermal perspective, visual context, secure transmission, and a platform that can move efficiently across uneven ground. But the real quality jump comes when collection and post-processing are tied together by a disciplined method.
And sometimes the best reminder comes from outside the drone world. A simple two-step mobile photography rule — crop to clarify the subject, then correct exposure and tonal balance — translates surprisingly well to field survey operations. On difficult land, clarity is earned twice: once in the air, and again at the desk.
Ready for your own Mavic 3T? Contact our team for expert consultation.