Mavic 3T Surveying Tips for Mountain Venues: Altitude
Mavic 3T Surveying Tips for Mountain Venues: Altitude, Thermal Context, and Route Planning That Actually Hold Up
META: Expert field guide to using the Mavic 3T for surveying mountain venues, with practical altitude strategy, thermal use, terrain challenges, and pipeline-style route assessment insights.
Mountain venue surveys punish vague planning.
A site can look straightforward on a map, then turn into a layered mess once you arrive: broken ridgelines, shaded gullies, unstable access tracks, wind funnels, patchy GNSS reception, and long walking distances between possible launch points. If the job is to evaluate a venue for events, infrastructure placement, construction staging, or access design, the drone plan has to do more than capture pretty aerials. It has to answer operational questions quickly.
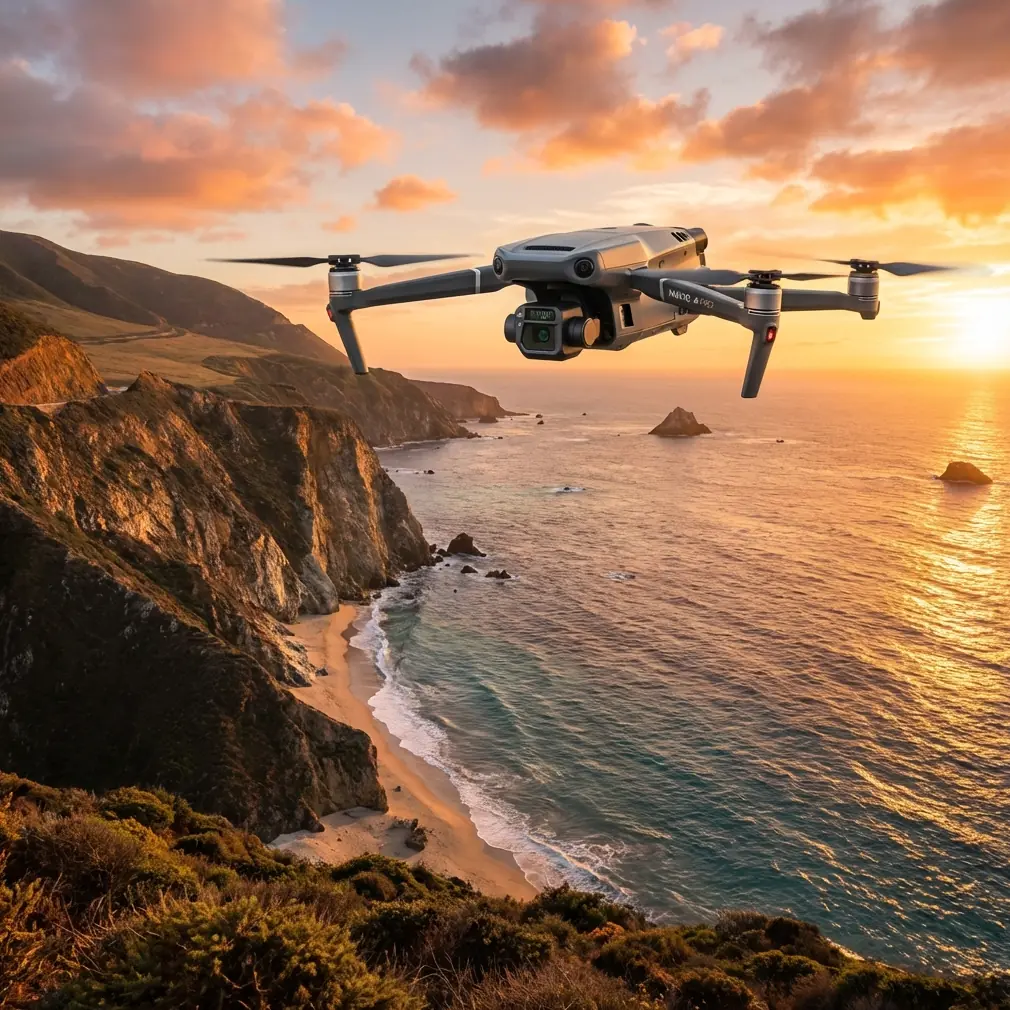
That is where the Mavic 3T becomes unusually useful.
Most articles about this aircraft stay generic. They talk about thermal payloads, compact form factor, and portability. None of that helps much when you are standing on a mountain shoulder trying to decide whether to fly 60 meters above takeoff, 100 meters above local terrain, or split the mission into stepped altitude blocks. For mountain venue work, the better frame of reference comes from two very different source threads: one tied to route reconnaissance in pipeline projects, and another tied to material behavior under changing conditions. Together, they point to a more disciplined way to fly the Mavic 3T in rough terrain.
The real problem with mountain venue surveys
Surveying a mountain venue is not just about image collection. It is about reducing uncertainty before people, equipment, and schedules enter the site.
The pipeline UAV reference is useful here because it highlights a practical truth: drones are valuable when they help teams rapidly understand terrain, landform, hydrology, and local weather conditions so route selection can be made on evidence instead of assumptions. That logic transfers almost perfectly to mountain venues. Whether the end use is a remote event platform, an eco-tourism facility, a hilltop utility site, or a construction staging zone, the first questions are nearly always the same:
- What is the safest and most efficient access path?
- Where does water move after rainfall?
- Which slopes are usable versus visually deceptive?
- Which areas hold heat, moisture, or shade longer?
- Where are the terrain breaks that affect setup, transport, or communications?
A mountain survey fails when the operator treats the site like flat ground and flies one clean-looking grid at one arbitrary height.
Why the Mavic 3T fits this job better than many teams realize
The Mavic 3T is often pigeonholed as a thermal observation tool. In mountain venue assessment, that undersells it.
Its value comes from combining fast deployment with multi-layer interpretation. You are not only documenting geometry for photogrammetry. You are also checking terrain behavior. Thermal signature, visible-light context, and repeatable route inspection can be collected in the same field session. That is a major advantage when mountain weather windows are short.
The platform’s O3 transmission matters more in mountains than in open plains because line-of-sight quality changes constantly with terrain masking. A venue tucked behind a spur can degrade signal confidence long before the aircraft is far away in linear distance. Stable transmission is not a luxury in this setting; it is what lets the pilot maintain disciplined positioning while working across changing elevations.
AES-256 also deserves a practical mention. Mountain venue surveys often involve unpublished infrastructure plans, private land boundaries, or event layout drafts. If the client is sharing route models, access points, or sensitive site imagery across teams, secure handling of flight data and transmission is not just an enterprise talking point. It is part of basic professional hygiene.
The altitude mistake most crews make
Here is the pattern I see too often: crews pick a single altitude based on habit.
They might launch and set 100 meters because that feels like a safe all-purpose number. Or they drop to 60 meters because they want more detail. Neither approach is inherently correct in mountains. What matters is the relationship between altitude, slope angle, relief variation, and the survey question.
A useful clue comes from the material handbook data, oddly enough. It shows how performance characteristics can change substantially under different treatment conditions and temperatures, with figures like 492 MPa, 794 MPa, and ranges around 880 to 900°C appearing in the reference. On the surface, that has nothing to do with drones. Operationally, it is a reminder that conditions change behavior. A system cannot be evaluated in the abstract; it must be judged in the state it is actually working in.
That same mindset applies to flight altitude in mountain surveys. “100 meters” is not one condition. Over a valley shoulder, it can mean broad situational coverage with manageable GSD. Over a steep rising face, the same nominal height above takeoff can collapse your effective stand-off distance and distort overlap. Over a descending ravine, it can leave you too high for useful surface interpretation.
My practical altitude rule for mountain venue surveys
For a first-pass Mavic 3T reconnaissance of a mountain venue, start by thinking in terrain-relative bands, not one global flight height.
A workable field pattern is:
- 60 to 80 meters above local terrain for detailed inspection of access tracks, drainage channels, retaining features, and setup pads.
- 90 to 120 meters above local terrain for broader venue layout understanding, ridgeline relationships, and route comparison.
- Split the mission into multiple segments if the elevation delta across the venue is large.
If the site has sharp relief, 100 meters above takeoff is often the wrong metric. In mountains, I would rather fly a shorter, terrain-conscious mission at a controlled local height than force one elegant but misleading grid.
That is the central altitude insight for this scenario: fly relative to terrain, not to your launch ego.
How thermal actually helps in venue surveying
Thermal is not there just to create dramatic images.
In mountain venue work, thermal signature can reveal patterns that are easy to miss in RGB-only flights:
- Drainage paths retaining moisture after sunrise
- Shaded ground that may stay soft longer
- Rock outcrops and hard surfaces that heat faster
- Uneven slope exposure affecting temporary installations
- Buried utilities or disturbed ground in developed sites, depending on conditions
This is where the pipeline-solution reference becomes operationally relevant again. It specifically points to using UAVs to quickly understand terrain, hydrology, and weather-related site characteristics to support route selection. On a mountain venue, “route selection” may mean guest access, utility trench alignment, cable routes, emergency egress, or equipment transport paths. Thermal gives another layer of evidence, especially in transitional periods early in the day when moisture and surface heating differences are more readable.
That said, timing matters. If you fly thermal at solar peak, many subtle differences flatten out. For venue reconnaissance, I prefer an early morning pass for drainage and residual moisture interpretation, then a later visible-light mission for texture and photogrammetric consistency.
Photogrammetry in mountains: use it, but don’t worship the grid
Mountain venues often tempt operators into overconfidence with automated grids.
Photogrammetry still matters, of course. You need elevation context, slope understanding, area calculations, and surface models. But steep terrain creates two common problems:
- Overlap that looks sufficient in the app but drops on oblique terrain.
- Surface features hidden from one flight direction because of ridges, cuts, or vegetation structure.
The fix is rarely complicated. It usually means combining a standard mapping pass with targeted cross-slope or oblique passes over critical features. If ground control points are available, use GCP placement strategically rather than evenly for the sake of symmetry. In mountain venues, a few well-distributed GCPs across elevation breaks are often more valuable than a neat but topographically indifferent layout.
This matters because a venue survey is not judged by how clean the flight plan looked. It is judged by whether the final model explains where vehicles can turn, where people can safely stage, and where drainage or slope instability may interfere with the plan.
Borrow a lesson from pipeline route work
The pipeline reference is one of the strongest clues in the source material because it frames drones as tools for selection and verification, not merely documentation. It states that UAVs can rapidly provide terrain, landform, hydrology, and weather information to support pipeline route choice. That same logic is exactly what mountain venue planners need.
When I adapt that workflow to the Mavic 3T, I structure the survey in three layers:
1. Access intelligence
Fly the road, trail, or service approach first. Do not start with the venue center. If trucks, material carriers, or crew cannot move efficiently, the venue’s scenic core is secondary.
2. Terrain suitability
Use visible and thermal data together to distinguish usable terraces from visually attractive but operationally poor ground. A flat-looking zone may still be a water collector or a soft patch.
3. Boundary and expansion context
Look beyond the immediate venue footprint. Mountain sites often need overflow parking, backup staging, drainage mitigation, or alternate setup pads. A route-based mindset catches these dependencies earlier.
That is the real crossover from pipeline surveying: the drone is helping you understand the system around the site, not just the site itself.
Wind, battery management, and mountain pacing
Mountain missions drain batteries differently from flatland work. Climb phases, hover corrections near ridgelines, and route repositioning all add up. This is where hot-swap workflow discipline matters, even if the aircraft itself is compact and quick to redeploy. The mistake is to treat each battery as a full mission guarantee. In mountains, each battery is a planning unit.
I recommend dividing the survey into discrete blocks tied to terrain sectors:
- lower access corridor
- mid-slope venue zone
- upper ridge or perimeter
- targeted thermal revisit
That approach improves data organization and reduces the temptation to stretch a flight into marginal reserve. It also lets the team adapt to changing cloud cover and wind without wrecking the whole capture logic.
BVLOS talk needs realism in this environment
BVLOS gets mentioned often in drone circles, but mountain venue work tends to expose the difference between regulatory theory and field reality. Even where advanced operational permissions exist, terrain masking changes the practical picture. A ridge between pilot and aircraft is not a technical footnote. It affects transmission confidence, situational awareness, and risk.
So while the Mavic 3T can support ambitious site coverage, mountain operations reward conservative geometry. Reposition the pilot if necessary. Use vantage-based leapfrogging. Keep route legs understandable. O3 transmission is a real asset here, but signal capability does not erase terrain.
A sample mission sequence that works
If I were surveying a mountain venue with the Mavic 3T tomorrow, I would likely run it in this order:
- Launch at first light from the most central safe access point.
- Thermal reconnaissance at 70 to 90 meters above local terrain to identify moisture-retaining drainage lines, cool shaded pockets, and heat-differentiated surfaces.
- Visible-light route pass along access roads or trails at lower altitude for operational detail.
- Terrain-relative mapping blocks at roughly 90 to 120 meters for broader venue modeling.
- Oblique follow-up passes over retaining walls, cut slopes, switchbacks, loading areas, and any suspect drainage crossings.
- Ground truth with selective GCP verification if a deliverable-grade model is required.
- Review critical thermal-visible comparisons before leaving site so missed areas can be reflown immediately.
That workflow is far more reliable than trying to force a single automated plan over the whole mountain.
If your team is trying to refine a route or compare launch strategies for a difficult hill site, you can also share the terrain details directly through this quick field coordination link: https://wa.me/85255379740
The hidden value of good mountain survey data
The best Mavic 3T mountain surveys do not just produce maps. They prevent bad decisions.
They stop planners from placing equipment where runoff collects. They reveal that a “short” access route is actually a poor logistics choice. They show that one terrace holds temperature and moisture differently from another. They clarify which ridgeline offers stable communication and which one only looks good from the valley floor.
That is why the source details matter. The pipeline document’s emphasis on rapid understanding of terrain, hydrology, and weather is not abstract. It maps directly to mountain venue risk reduction. And the materials handbook, despite being from a very different domain, reinforces an engineering habit that good drone operators share: performance must be interpreted under actual conditions, not assumed from a nominal value. In that sense, even a figure like 492 MPa versus 794 MPa becomes a useful mental model. Conditions change outcomes. So does terrain. So does altitude.
For mountain venue surveys, the Mavic 3T performs best when flown with that mindset.
Not higher by default. Not lower by instinct. Smarter by terrain.
Ready for your own Mavic 3T? Contact our team for expert consultation.